Minikube and Kubectl
Learning Objectives
- You know how to create a Kubernetes cluster with Minikube.
- You know how to create a deployment and how to expose it as a service.
- You know how to update and rollback a deployment.
Here, we use Minikube to gain hands-on experience from working with Kubernetes. Minikube is a single-node Kubernetes cluster intended mainly for learning and development. Kubectl, on the other hand, is the command line tool for interacting with a Kubernetes cluster.
Follow along the examples, trying them out locally. At the end of the chapter, and a few of the subsequent chapters, you are expected to return a zip file with the project described in this and the subsequent chapters.
Minikube setup
First, install Minikube on your system following Minikube guidelines. There is no need to separately install kubectl, as we’ll use it through Minikube command.
kubectl is a command-line tool for interacting with Kubernetes clusters.
Once you have installed Minikube, check the version using minikube version. These materials have been tested with Minikube version 1.35.0. Newer versions should also be ok.
minikube versionFurthermore, use Minikube to install kubectl by running minikube kubectl. This command will install kubectl and configure it to use the Minikube cluster. You can verify the installation by checking the kubectl version:
minikube kubectl -- versionFor quicker use of kubectl, you can create an alias for kubectl:
alias kubectl="minikube kubectl --"This alias will allow you to use kubectl commands directly without specifying minikube kubectl -- each time. For example, now the version can be checked with kubectl version. In the following examples, when you see kubectl, it refers to minikube kubectl --.
Starting Minikube
To start Minikube, run the command:
minikube start --kubernetes-version=v1.32.0The command will start a local Kubernetes cluster using the specified Kubernetes version v1.32.0. Starting Minikube may take a few minutes, as it downloads the necessary components and starts the cluster.
After starting Minikube, you can view the status nodes with the command kubectl get nodes. The output should show the Minikube node as Ready:
kubectl get nodesNAME STATUS ROLES AGE VERSIONminikube Ready control-plane 9m37s v1.32.0Similarly, you can view all running resources using kubectl get all. At the beginning, there are almost no resources in the cluster:
kubectl get allNAME TYPE CLUSTER-IP EXTERNAL-IP PORT(S) AGEservice/kubernetes ClusterIP 10.96.0.1 <none> 443/TCP 2m35sInitially, you will see only the Kubernetes service. As you deploy applications, you will see more resources listed.
If you have resources in the cluster from some earlier testing, you can delete them and start a fresh cluster by running
minikube deleteand thenminikube start.
Minikube has a built-in dashboard that provides a graphical interface to view and manage the cluster. To access the dashboard, run the command:
minikube dashboardThe command launches a web browser and opens the Kubernetes dashboard. The view should be similar to the one shown in Figure 1 below.
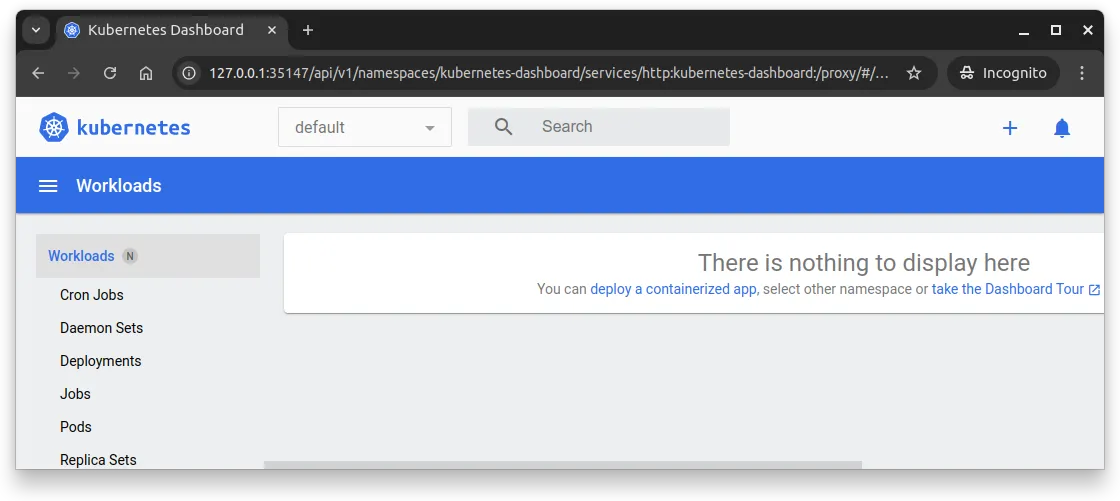
The dashboard provides an overview of the cluster, including information about nodes, deployments, services, and more. You can use the dashboard to view and manage resources in the cluster.
To stop Minikube, run the command:
minikube stopIn the following, we assume that Minikube is running (i.e., if you just stopped it, start it again with minikube start --kubernetes-version=v1.32.0).
Creating a deployment
Next, let’s walk through creating a Kubernetes deployment. We’ll first create an image that we’ll deploy, then setup a deployment script, and finally deploy the image. For this, create a new folder — say minikube-demo — and use that as the root for the project.
Creating an image
First, create a folder server to the minikube-demo folder. Follow the guidelines at Deno Server-side Application to create a Deno server-side application that can be run with Docker within the folder. Omit the creation of the Docker Compose file.
At the end, the folder structure should look like this:
.└── server ├── app.js ├── app-run.js ├── deno.json └── DockerfileWhen the server is run, it should respond to requests as follows:
curl localhost:8000{"message":"Hello world!"}%Next, navigate to the server folder with the Dockerfile. By default, Docker images are built for the Docker daemon running on the host machine. Minikube, however, runs its own daemon. To be able to access Docker images in Minikube, we need to build so that Minikube can access them.
To build an image for Minikube, we use the minikube image build command that works similarly to the docker build command. In the server folder, run the following command:
minikube image build -t minikube-demo-server:1.0 .This creates a new image called minikube-demo-server with the tag 1.0. The image is built from the current directory (.), which contains the Dockerfile and the server application.
Now, when you run the command minikube image ls on your local computer, you should see the minikube-demo-server image listed.
$ minikube image ls...docker.io/library/minikube-demo-server:1.0...This means that the image has been built and is available for use in the Minikube cluster.
It is also possible to build the image with Docker and then load it to Minikube. If the local Docker would have an image called
minikube-demo-server, we would use the commandminikube image load minikube-demo-serverto load the image.
Creating a deployment file
Next, create a folder k8s within the minikube-demo folder. In the k8s folder, create a file called minikube-demo-server-deployment.yaml with the following content:
apiVersion: apps/v1kind: Deploymentmetadata: name: minikube-demo-server-deployment labels: app: minikube-demo-serverspec: replicas: 1 selector: matchLabels: app: minikube-demo-server template: metadata: labels: app: minikube-demo-server spec: containers: - name: minikube-demo-server image: minikube-demo-server:1.0 imagePullPolicy: Never ports: - containerPort: 8000The file contains a declarative description of the deployment named minikube-demo-server-deployment. The deployment is set to run one replica of the minikube-demo-server image with the tag 1.0. The image is pulled from the local Docker registry, as indicated by imagePullPolicy: Never. The container listens on port 8000 — the same port as the server application is running.
It is also possible to imperatively deploy images. However, declarative deployments are recommended, as they provide a clear description of the desired state of the application.
When we consider the terms pod, replica set, and deployment, in the above configuration, the deployment automatically creates a replica set, which in turn creates a pod. The pod runs the container with the specified image. More specifically, the configuration describes both a deployment and a pod. The pod is created based on the template defined in the deployment configuration, while the deployment manages the pod and ensures that the desired number of replicas is running. Figure 2 below showcases the configuration as a tree-like diagram.
Applying the deployment
To apply the deployment — applying means running the given declarative configuration — run the following command from the minikube-demo folder:
kubectl apply -f k8s/minikube-demo-server-deployment.yamlThe command applies the deployment configuration to the Minikube cluster. The output should indicate that the deployment has been created:
deployment.apps/minikube-demo-server-deployment createdNow, when we check the status of the deployment with the command kubectl get all, we should see the deployment, replica set, and pod running:
NAME                                                   READY   STATUS    RESTARTS   AGEpod/minikube-demo-server-deployment-694d46996b-ffd87   1/1     Running   0          7s
NAME                 TYPE        CLUSTER-IP   EXTERNAL-IP   PORT(S)   AGEservice/kubernetes   ClusterIP   10.96.0.1    <none>        443/TCP   103s
NAME                                              READY   UP-TO-DATE   AVAILABLE   AGEdeployment.apps/minikube-demo-server-deployment   1/1     1            1           7s
NAME                                                         DESIRED   CURRENT   READY   AGEreplicaset.apps/minikube-demo-server-deployment-694d46996b   1         1         1       7s
Adding a service and accessing the deployment
The deployment is running within the Kubernetes cluster. To access the server application, we need to expose the deployment as a service. You can think of a service as a way to expose a deployment to the outside world — services can be, for example, used to load balance traffic between multiple pods.
Create a file minikube-demo-server-service.yaml in the k8s folder with the following content:
apiVersion: v1kind: Servicemetadata: name: minikube-demo-server-servicespec: type: LoadBalancer ports: - port: 8000 targetPort: 8000 protocol: TCP selector: app: minikube-demo-serverThe configuration describes a service named minikube-demo-server-service that exposes the deployment to the outside world. The service listens on port 8000 and forwards the traffic to the pods running the minikube-demo-server application. The service is of type LoadBalancer, which means that Minikube will create a load balancer to route traffic to the service.
It is also possible to create a Traefik load balancer as the service. For more information, see the Traefik documentation.
Then, apply the service configuration with the command:
kubectl apply -f k8s/minikube-demo-server-service.yamlThe output should indicate that the service has been created:
service/minikube-demo-server-service createdNow, when you run the command kubectl get all, you should see the service listed:
NAME                                                   READY   STATUS    RESTARTS   AGEpod/minikube-demo-server-deployment-694d46996b-ffd87   1/1     Running   0          33s
NAME                                   TYPE           CLUSTER-IP       EXTERNAL-IP   PORT(S)          AGEservice/kubernetes                     ClusterIP      10.96.0.1        <none>        443/TCP          2m9sservice/minikube-demo-server-service   LoadBalancer   10.101.158.231   <pending>     8000:32531/TCP   6s
NAME                                              READY   UP-TO-DATE   AVAILABLE   AGEdeployment.apps/minikube-demo-server-deployment   1/1     1            1           33s
NAME                                                         DESIRED   CURRENT   READY   AGEreplicaset.apps/minikube-demo-server-deployment-694d46996b   1         1         1       33s
The service is now running and should be accessible from the outside world. To get the external IP address of the service, run the command:
minikube service minikube-demo-server-service --urlThe command returns the URL to access the service such as http://192.168.49.2:32531. For the above, the response from the server should be the same as when running the server locally (change the address to match the output from the above command):
$ curl http://192.168.49.2:32531{"message":"Hello world!"}%Updating deployment
To update a deployment, we can change the deployment configuration and apply the changes. To demonstrate this, let’s first create a new version of the server image. Update the app.js file in the server folder to respond with a different message, e.g. Hello from Minikube!. Then, within the server folder, rebuild the image with the command:
minikube image build -t minikube-demo-server:1.1 .This creates an image minikube-demo-server with the tag 1.1. Next, update the deployment configuration to use the new image. Update the minikube-demo-server-deployment.yaml file in the k8s folder to use the new image:
apiVersion: apps/v1kind: Deploymentmetadata: name: minikube-demo-server-deployment labels: app: minikube-demo-serverspec: replicas: 1 selector: matchLabels: app: minikube-demo-server template: metadata: labels: app: minikube-demo-server spec: containers: - name: minikube-demo-server image: minikube-demo-server:1.1 imagePullPolicy: Never ports: - containerPort: 8000Next, as we have changed the configuration and have a new version of the image, we update the deployment by again applying the deployment configuration. To do this, run the command:
kubectl apply -f k8s/minikube-demo-server-deployment.yamlNow, the response from the server is similar to the following:
deployment.apps/minikube-demo-server-deployment configuredThis indicates that the deployment has been updated.
Now, when we check the status of the deployment with the command kubectl get all, we see that the new version of the deployment is being rolled out. A new pod is created, and there is an old replicaset that is no longer used while a new replicaset has been created:
NAME                                                   READY   STATUS    RESTARTS   AGEpod/minikube-demo-server-deployment-758d4b5d7c-qtgxd   1/1     Running   0          45s
NAME                                   TYPE           CLUSTER-IP       EXTERNAL-IP   PORT(S)          AGEservice/kubernetes                     ClusterIP      10.96.0.1        <none>        443/TCP          5m21sservice/minikube-demo-server-service   LoadBalancer   10.101.158.231   <pending>     8000:32531/TCP   3m18s
NAME                                              READY   UP-TO-DATE   AVAILABLE   AGEdeployment.apps/minikube-demo-server-deployment   1/1     1            1           3m45s
NAME                                                         DESIRED   CURRENT   READY   AGEreplicaset.apps/minikube-demo-server-deployment-694d46996b   0         0         0       3m45sreplicaset.apps/minikube-demo-server-deployment-758d4b5d7c   1         1         1       45s
Now, when you access the service, you should see the new message:
curl http://192.168.49.2:32531{"message":"Hello from Minikube!"}%Rolling back
Imagine that you just messed up something in the deployment. You can rollback the deployment to the previous state by running the command:
kubectl rollout undo deployment.apps/minikube-demo-server-deploymentThis command rolls back the deployment to the previous state. The name deployment.apps is the same that we see in the output of kubectl get all. The output from running the command should indicate that the deployment has been rolled back:
deployment.apps/minikube-demo-server-deployment rolled backNow, when we check the status of the deployment with the command kubectl get all, we see that the older replicaset is in use.
NAME                                                   READY   STATUS    RESTARTS   AGEpod/minikube-demo-server-deployment-694d46996b-vc62v   1/1     Running   0          68s
NAME                                   TYPE           CLUSTER-IP       EXTERNAL-IP   PORT(S)          AGEservice/kubernetes                     ClusterIP      10.96.0.1        <none>        443/TCP          9m12sservice/minikube-demo-server-service   LoadBalancer   10.101.158.231   <pending>     8000:32531/TCP   7m9s
NAME                                              READY   UP-TO-DATE   AVAILABLE   AGEdeployment.apps/minikube-demo-server-deployment   1/1     1            1           7m36s
NAME                                                         DESIRED   CURRENT   READY   AGEreplicaset.apps/minikube-demo-server-deployment-694d46996b   1         1         1       7m36sreplicaset.apps/minikube-demo-server-deployment-758d4b5d7c   0         0         0       4m36s
And that the server responds with the old message:
$ curl http://192.168.49.2:32531{"message":"Hello world!"}%The Kubernetes dashboard also provides a view of the deployment and its status. You can use the dashboard to view the deployment, replicaset, and pods, as well as to access logs and other information about the resources.
Above, we intentionally demonstrated the rollout functionality of Kubernetes. Rollout (and rollbacks) are primarily used when controlling Kubernetes imperatively. We could have as well — and might have even preferred to — again modify the minikube-demo-server-deployment.yaml file and then apply it again.
Cleaning up
Finally, it’s time to clean up. We can start with deleting the ReplicaSet that is not in use. To delete an item, we can use kubectl delete, followed by the name of the item.
kubectl delete replicaset.apps/minikube-demo-server-deployment-758d4b5d7cThe response should be as follows.
replicaset.apps "minikube-demo-server-deployment-758d4b5d7c" deletedThen, we can delete the image from Minikube that is not in use.
minikube image rm docker.io/library/minikube-demo-server:1.1After this, the minikube image ls command no longer includes the minikube-demo-server image with tag 1.1.
To delete the service and the deployment, we can use the command kubectl delete, which is followed by the configuration that we wish to delete. To delete both, we can provide the configurations as a comma-separated list as follows.
kubectl delete -f k8s/minikube-demo-server-service.yaml,k8s/minikube-demo-server-deployment.yamlThe output of the command is then as follows.
service "minikube-demo-server-service" deleteddeployment.apps "minikube-demo-server-deployment" deletedThe above works for apply. For example, if we would have both deployment and a service configurations ready, we could apply both with the command
kubectl apply -f k8s/minikube-demo-server-service.yaml,k8s/minikube-demo-server-deployment.yaml