Working with Firebase
Learning Objectives
- You know what Firebase is and know how to build an application that uses it.
In this chapter, we’ll briefly look into using a Backend as a Service (BaaS) called Firebase, which provides functionality that can be used to support our applications. Firebase offers a free tier that, when carefully used within the context of the course, is sufficient for our needs, but allows growing the application later on.
In this example, we’ll be building a note-taking application that allows users to create, edit, and delete notes, and that uses Firebase for storing the notes. The notes are stored in a Cloud Firestore database, and the users are authenticated using Firebase Authentication.
Follow the example by setting up your own project and testing the application out step by step — at the end, you’ll have an application that looks somewhat similar to the following (although with different styles): https://fitech101.github.io/notes-app/.
At the end of this chapter, you end up submitting the project as a zip.
Notes application
Before getting started with Firebase, let’s set up a simple notes application that we can use as a starting point.
Creating a project
We’ll start by creating a new Flutter project called flutter_notes_app using flutter create.
flutter create flutter_notes_app
Creating project flutter_notes_app...
Resolving dependencies in `flutter_notes_app`...
Downloading packages...
Got dependencies in `flutter_notes_app`.
Wrote 129 files.

All done!
You can find general documentation for Flutter at: https://docs.flutter.dev/
Detailed API documentation is available at: https://api.flutter.dev/
If you prefer video documentation, consider: https://www.youtube.com/c/flutterdev

In order to run your application, type:

  $ cd flutter_notes_app
  $ flutter run

Your application code is in flutter_notes_app/lib/main.dart.
When created, the lib folder has only one file, main.dart.
Creating a model
We’ll start by creating a Note class that will represent a note. Create a folder models into the lib folder and create a file note.dart inside it. Place the following contents to the folder — the class represents a note with an id and content field.
class Note {
  final String id;
  final String content;

  Note({required this.id, required this.content});
}
We’ll use String as the type for both the id and the content. Contrary to commonly used numeric identifiers in databases, we’ll be using an UUID-based identifier.
Creating a controller for notes
Let’s next create a controller for the notes. We’ll first add get to the project depedencies (i.e. the pubspec.yaml file). After modifications, the depedencies part of the pubspec.yaml is as follows.
dependencies:
  flutter:
    sdk: flutter

  get: 4.6.6
  cupertino_icons: ^1.0.8
Create a folder controllers to the lib folder, and create a file called note_controller.dart to the folder controllers. Place the following contents to the file — the class represents a controller that is used to create and delete notes.
import 'package:get/get.dart';
import '../models/note.dart';

class NoteController {
  var notes = <Note>[].obs;

  void addNote(String content) {
    notes.add(
      Note(id: DateTime.now().toString(), content: content),
    );
  }

  void deleteNoteById(String id) {
    notes.removeWhere((note) => note.id == id);
  }
}
Creating a screen
Let’s next create a screen that will be used to create and delete notes. Create a folder screens to the lib folder, and create a file called note_screen.dart to the folder screens. Place the following contents to the file — the class shows a screen with the text “My notes” that has two widgets — one for adding notes and one for listing the notes.
import 'package:flutter/material.dart';
import 'package:get/get.dart';
import '../controllers/note_controller.dart';

class NoteScreen extends StatelessWidget {
  @override
  Widget build(BuildContext context) {
    return Scaffold(
      appBar: AppBar(
        title: const Text('My notes'),
      ),
      body: Column(
        children: [
          AddNoteWidget(),
          Expanded(
            child: NoteListWidget(),
          ),
        ],
      ),
    );
  }
}

class AddNoteWidget extends StatelessWidget {
  final noteController = Get.find<NoteController>();

  @override
  Widget build(BuildContext context) {
    final textInputController = TextEditingController();

    return Column(
      children: [
        TextField(
          controller: textInputController,
          decoration: const InputDecoration(
            hintText: 'Enter note',
            border: OutlineInputBorder(),
          ),
          maxLines: null,
        ),
        TextButton(
          onPressed: () {
            if (textInputController.text.trim().isEmpty) return;

            noteController.addNote(textInputController.text);
            textInputController.clear();
          },
          child: const Text('Add note'),
        ),
      ],
    );
  }
}

class NoteListWidget extends StatelessWidget {
  final noteController = Get.find<NoteController>();
  @override
  Widget build(BuildContext context) {
    return Obx(
      () => ListView.builder(
        itemCount: noteController.notes.length,
        itemBuilder: (context, index) {
          final note = noteController.notes[index];
          return Card(
            child: ListTile(
              title: Text(note.content),
              trailing: IconButton(
                icon: const Icon(Icons.delete),
                onPressed: () => noteController.deleteNoteById(note.id),
              ),
            ),
          );
        },
      ),
    );
  }
}
Most of the code is familiar to us from the course already, but there are a few additional small things. First of all, when setting the maxLines property of the TextField to null, the text field will grow as the user types more text. As a reminder, the ListView.builder is a convenience constructor that allows creating a list of widgets from a list of data. The itemBuilder function is called for each item in the list, where the function returns a widget representing the item. The itemCount property on the other hand is used to tell the builder the number of items in the list.
Adjusting main
Now that we have the model, the controller, and the screen, we can glue them together in the main.dart file. Replace the contents of the file with the following code — the code creates a MaterialApp that uses the NoteScreen as the home screen.
import 'package:flutter/material.dart';
import 'package:get/get.dart';
import 'controllers/note_controller.dart';
import 'screens/note_screen.dart';
void main() {
Get.lazyPut<NoteController>(() => NoteController());
runApp(ProviderScope(child: NotesApp()));
}
class NotesApp extends StatelessWidget {
@override
Widget build(BuildContext context) {
return MaterialApp(
title: 'My notes',
home: NoteScreen(),
);
}
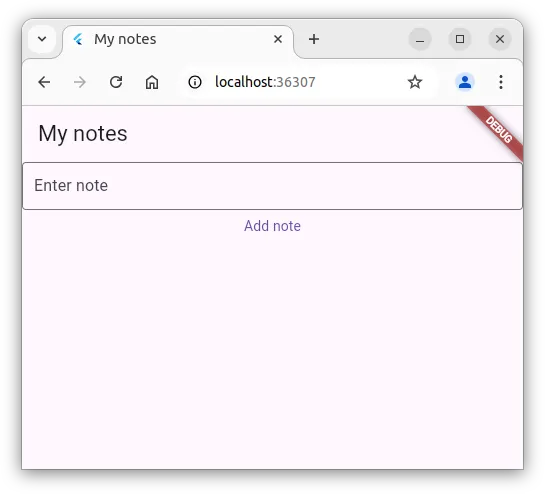
}When we run the application, the notes application looks similar to the one shown in Figure 1.
Firebase and Firestore
At this point, we have a basic note-taking application that allows typing in notes, listing them, and deleting them. The data is not stored anywhere yet, however. Here, we’ll look into working with Firestore to store the data in the cloud.
Starting with Firebase
To get started with Firebase, follow the Add Firebase to your Flutter app guidelines in the Flutter documentation at https://firebase.google.com/docs/flutter/setup. To summarize, you need to:
- Sign into Firebase Console and create a Firebase project
- Install the Firebase CLI
- Login to Firebase with the CLI using
firebase login - install FlutterFire CLI by running
dart pub global activate flutterfire_cli - Configure FlutterFire for the Flutter project by running
flutterfire configurein the root folder of the Flutter project — among other things, this creates a file calledfirebase_options.dartto thelibfolder - Add the
firebase_corepackage to the Flutter project and re-configure the project by runningflutterfire configureagain — this can be done by callingflutter pub add firebase_coreand thenflutterfire configurein the root folder of the Flutter project - Add the following packages and the Firebase initialization script to
main.dart(which is in thelibfolder).
import 'package:firebase_core/firebase_core.dart';
import 'firebase_options.dart';

// and to the main function:
await Firebase.initializeApp(
  options: DefaultFirebaseOptions.currentPlatform,
);
With the changes, the main.dart should look as follows.
import 'package:firebase_core/firebase_core.dart';
import 'package:flutter/material.dart';
import 'package:get/get.dart';
import 'controllers/note_controller.dart';
import 'screens/note_screen.dart';
import 'firebase_options.dart';

Future<void> main() async {
  await Firebase.initializeApp(
    options: DefaultFirebaseOptions.currentPlatform,
  );
  Get.lazyPut<NoteController>(
    () => NoteController(),
  );
  runApp(
    NotesApp(),
  );
}

class NotesApp extends StatelessWidget {
  @override
  Widget build(BuildContext context) {
    return GetMaterialApp(
      title: 'My notes',
      home: NoteScreen(),
    );
  }
}
With the changes in place, the application should still start up as before.
Creating a Firestore database
Next, we create a Firestore database. Access the Firebase console, open up our project, and select Firestore database. Click the “Create database” button to create a database for the project. Let’s start with by creating a test database — when creating a database, select “Start in Test mode”. As the location, we use eur3, which is a Multi-region location, but other locations work as well.
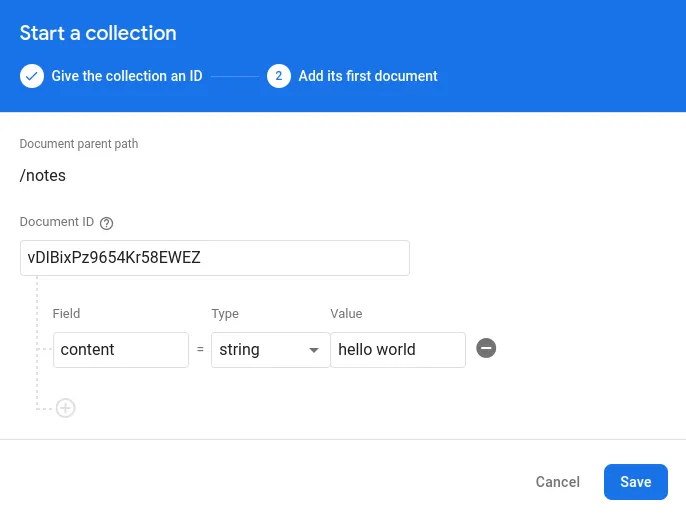
When a new Firestore database has been created, there are no collections yet. Create a new collection by clicking the “Start collection” button. We’ll use notes as the name — leading to /notes as the document path, and create a single note to the database. As the document id, we use the auto id option, and as the content, we use “hello world”, as shown in Figure 2 below.
Now that we have a collection, let’s access it from our application.
Accessing the database
To access the database, we need to have the cloud_firestore plugin in the project, and we need to create the functionality for accessing the database.
Add the Firestore plugin (cloud_firestore) to the project. Run the command flutter pub add cloud_firestore, followed by the command flutterfire configure. This will adjust the firebase_options.dart to some and add the cloud_firestore package to the pubspec.yaml file. At this point, the dependencies-part of pubspec.yaml should be as follows.
dependencies:
  flutter:
    sdk: flutter

  get: 4.6.6
  cupertino_icons: ^1.0.8
  firebase_core: 3.6.0
  cloud_firestore: 5.4.4
Let’s first test that we can access the database. Modify the main.dart as follows and restart the application.
import 'package:cloud_firestore/cloud_firestore.dart';
import 'package:firebase_core/firebase_core.dart';
import 'package:flutter/material.dart';
import 'package:get/get.dart';
import 'controllers/note_controller.dart';
import 'screens/note_screen.dart';
import 'firebase_options.dart';

Future<void> main() async {
  await Firebase.initializeApp(
    options: DefaultFirebaseOptions.currentPlatform,
  );

  final FirebaseFirestore _firestore = FirebaseFirestore.instance;
  final snapshot = await _firestore.collection('notes').get();
  snapshot.docs.forEach((doc) => print('${doc.id}: ${doc.data()}'));

  Get.lazyPut<NoteController>(
    () => NoteController(),
  );
  runApp(
    GetMaterialApp(
      title: 'My notes',
      home: NotesApp(),
    ),
  );
}

class NotesApp extends StatelessWidget {
  @override
  Widget build(BuildContext context) {
    return NoteScreen();
  }
}
Running the above code should, in addition to launching the application, lead to seeing the document content in the console.
vDlBixPz9654Kr58EWEZ: {content: hello world}Now that we know that we can access the database, let’s remove the changes related to logging the database contents from main.dart and continue with adjusting the application to work with the database.
Notes and Firestore
Let’s next adjust our application to retrieve the notes from Firestore. In the present state, the notes are stored in the NoteController and they are available only in the memory.
Note model
The data that we are working with is stored as maps in Firestore. Let’s first adjust the Note class to add convenience methods for transforming a map into a note and a note into a map. Adjust the Note class to match the following.
class Note {
  final String id;
  final String content;

  Note({required this.id, required this.content});

  factory Note.fromFirestore(Map<String, dynamic> data, String id) {
    return Note(
      id: id,
      content: data['content'],
    );
  }

  Map<String, dynamic> toFirestore() {
    return {
      'content': content,
    };
  }
}
In brief, the Note.fromFirestore method takes a map and a document id as parameters and returns a Note instance (we’ll explicitly use a separate document id as the Firebase APIs separate the id and the document contents). The Note.toFirestore method returns a map that can be used to store the note in Firestore — when storing a note, we’ll use the key separately.
Note controller
Next, we need to adjust the NoteController to use the Note class and to retrieve the notes from Firestore. Adjust the NoteController to match the following.
import 'package:cloud_firestore/cloud_firestore.dart';
import 'package:get/get.dart';
import '../models/note.dart';

class NoteController extends GetxController {
  final FirebaseFirestore _firestore = FirebaseFirestore.instance;
  var notes = <Note>[].obs;

  @override
  void onInit() async {
    super.onInit();
    final snapshot = await _firestore.collection('notes').get();
    final notesList = snapshot.docs.map((doc) {
      return Note.fromFirestore(doc.data(), doc.id);
    }).toList();

    notes.value = notesList;
  }

  void addNote(String content) async {
    final noteData = Note(
      id: '',
      content: content,
    ).toFirestore();

    final noteRef = await _firestore.collection('notes').add(noteData);
    final note = Note.fromFirestore(noteData, noteRef.id);
    notes.add(note);
  }

  void deleteNoteById(String id) async {
    await _firestore.collection('notes').doc(id).delete();
    notes.removeWhere((note) => note.id == id);
  }
}
Now, the NoteController retrieves the notes from Firestore when opening the application. Further, the addNote and deleteNote methods have been adjusted to use the Firestore API.
Note that our above implementation is missing useful things such as error handling. In the case of errors, the user should likely be notified of them, but we’ll omit such details for now.
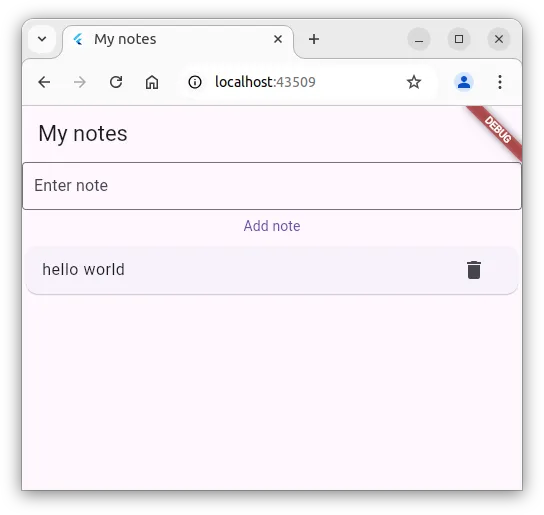
Now, when you start the application, you can see that the notes are retrieved from Firestore and displayed in the application. Similarly, any changes to the notes are reflected in the application and in the database. The Figure 3 shows the application running with the “hello world” document retrieved from Firestore.
Firebase authentication
Presently, anyone opening the application can see all the notes and can add and delete notes. Let’s modify the application so that notes are personal — that is, users can see, add, and delete only their own notes. To achieve this, we’ll use Firebase Authentication.
Starting with Firebase authentication
To get started with Firebase authentication, follow the Get Started with Firebase Authentication on Flutter guide at https://firebase.google.com/docs/auth/flutter/start. To summarize, you need to:
- Add the
firebase_authpackage to the project by runningflutter pub add firebase_auth, and then runningflutterfire configure. After this, the dependencies part of thepubspec.yamlfile should be as follows:
dependencies:
  flutter:
    sdk: flutter

  get: 4.6.6
  cupertino_icons: ^1.0.8
  firebase_auth: 5.3.1
  firebase_core: 3.6.0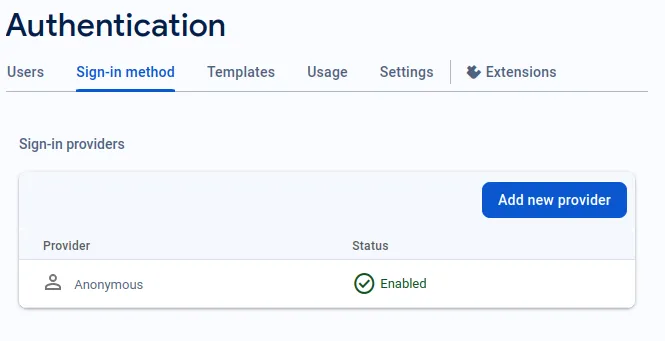
cloud_firestore: 5.4.4- Enable authentication in the [Firebase console]https://console.firebase.google.com/) by clicking your project, choosing (or searching) authentication, and selecting a Sign-in-method. Here, we’ll use anonymous authentication, so we’ll select Anonymous, and enable it. Once selected, the sign-in method in the Authentication part of the console for the project should look similar to Figure 4 below.
Creating a user controller
Next, let’s create a controller that is used to provide access to the user. Create a file called user_controller.dart in the folder controllers under lib and place the following contents to the file.
import 'package:firebase_auth/firebase_auth.dart';
import 'package:get/get.dart';

class UserController extends GetxController {
  var user = Rx<User?>(FirebaseAuth.instance.currentUser);

  loginAnonymously() async {
    final credentials = await FirebaseAuth.instance.signInAnonymously();
    user.value = credentials.user;
  }
}
The FirebaseAuth class provides access to the Firebase Authentication service, allowing us to access the current user if such exists. In addition, the controller will also provide a method loginAnonymously, which makes a request to the Firebase Authentication service, asking for anonymous login. The method returns an instance of credentials, which has a user instance within it. We do not need to create the User model, as it is included in the firebase_auth package.
Login screen
Let’s next create a login screen that can be used for authentication. For now, we are using anonymous authentication, which is done by calling the method loginAnonymously from the UserController we implemented above. The login screen will simply show a button that, when pressed, calls the method.
Create a file called login_screen.dart in the folder screens under lib and place the following contents to the file.
import 'package:flutter/material.dart';
import 'package:get/get.dart';
import '../controllers/user_controller.dart';

class LoginScreen extends StatelessWidget {
  final userController = Get.find<UserController>();

  @override
  Widget build(BuildContext context) {
    return Scaffold(
      body: Center(
        child: Column(
          mainAxisAlignment: MainAxisAlignment.center,
          children: [
            ElevatedButton.icon(
              icon: const Icon(Icons.login),
              label: const Text('Login anonymously'),
              onPressed: () => userController.loginAnonymously(),
            ),
          ],
        ),
      ),
    );
  }
}
Adjusting notes app
Let’s next adjust our NotesApp in main.dart to account for whether the user has logged in. The key change is using GetX to change what is shown as the main screen depending on whether the user value is null or not null.
import 'package:firebase_core/firebase_core.dart';
import 'package:flutter/material.dart';
import 'package:get/get.dart';
import 'controllers/note_controller.dart';
import 'controllers/user_controller.dart';
import 'screens/login_screen.dart';
import 'screens/note_screen.dart';
import 'firebase_options.dart';

Future<void> main() async {
  await Firebase.initializeApp(
    options: DefaultFirebaseOptions.currentPlatform,
  );

  Get.lazyPut<NoteController>(
    () => NoteController(),
  );
  Get.lazyPut<UserController>(
    () => UserController(),
  );

  runApp(
    GetMaterialApp(
      title: 'My notes',
      home: NotesApp(),
    ),
  );
}

class NotesApp extends StatelessWidget {
  final userController = Get.find<UserController>();
  @override
  Widget build(BuildContext context) {
    return Obx(
      () {
        if (userController.user.value == null) {
          return LoginScreen();
        } else {
          return NoteScreen();
        }
      },
    );
  }
}
Now, when we open up the application, the application looks similar to Figure 4 below.
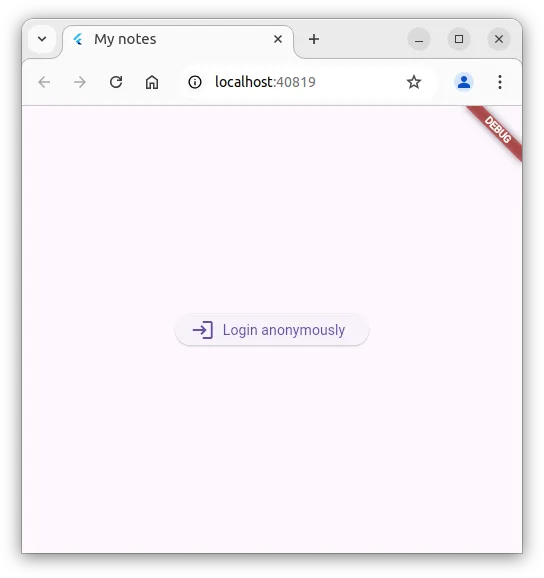
When we press the login button, there is a brief delay when the anonymous authentication is conducted, after which the application looks similar to Figure 5 below — that is, now we see the notes screen with the existing notes.
Accounting for user in notes
Currently, the created notes are not related to the specific user, but are still generic and available for all. Let’s next adjust the application so that users can see their own notes.
Adjusting user model
First, we’ll add a field to the Note that contains the user id. Adjust the note.dart to match the following.
class Note {
  final String id;
  final String content;
  final String userId;

  Note({required this.id, required this.content, required this.userId});

  factory Note.fromFirestore(Map<String, dynamic> data, String id) {
    return Note(
      id: id,
      content: data['content'],
      userId: data['userId'],
    );
  }

  Map<String, dynamic> toFirestore() {
    return {
      'content': content,
      'userId': userId,
    };
  }
}
Adjusting the note controller
Next, we’ll adjust the note provider so that it retrieves only the notes that belong to the current user. For this, we need to add the user id to the note controller and adjust the queries that are used to retrieve data from the database and to add data to the database. In addition, we also need to adjust the creation of the note controller to account for the user controller.
Adjust the note_controller.dart to match the following.
import 'package:cloud_firestore/cloud_firestore.dart';
import 'package:get/get.dart';
import '../controllers/user_controller.dart';
import '../models/note.dart';

class NoteController extends GetxController {
  final userController = Get.find<UserController>();
  final FirebaseFirestore _firestore = FirebaseFirestore.instance;
  var notes = <Note>[].obs;

  @override
  void onInit() async {
    super.onInit();

    if (userController.user.value == null) {
      return;
    }

    final snapshot = await _firestore
        .collection('notes')
        .where('userId', isEqualTo: userController.user.value!.uid)
        .get();
    final notesList = snapshot.docs.map((doc) {
      return Note.fromFirestore(doc.data(), doc.id);
    }).toList();

    notes.value = notesList;
  }

  void addNote(String content) async {
    final noteData = Note(
      id: '',
      content: content,
      userId: userController.user.value!.uid,
    ).toFirestore();

    final noteRef = await _firestore.collection('notes').add(noteData);
    final note = Note.fromFirestore(noteData, noteRef.id);
    notes.add(note);
  }

  void deleteNoteById(String id) async {
    await _firestore.collection('notes').doc(id).delete();
    notes.removeWhere((note) => note.id == id);
  }
}
Now, when you try out the application, you’ll see that the notes are now specific to the user. When testing the application out in a browser, you can verify this by opening the application in incognito mode.
Security rules
Right now, even though we have restricted the notes to be specific for specific users on the client side, anyone can still access the database and modify the data, as client-side verifications and functionality is easy to bypass. To prevent this, we can add security rules to the database that govern access to the data. When working with Firebase, we use Firebase Security Rules.
The security rules can be accessed in the Firebase console under Firestore Database at the tab Rules. The rules are written in a custom language called Firestore Security Rules, and are evaluated on the server — clients are only allowed to read and write data that is allowed by the rules. By default, as we started with the test database when creating the database, the rules are set to allow anyone to read and write database content, given that the time of the request is within the given boundaries. As an example, the following rules allow anyone to read and write data to the database, as long as the request is made before May 1st, 2023:
rules_version = '2';
service cloud.firestore {
  match /databases/{database}/documents {
    match /{document=**} {
      allow read, write: if
          request.time < timestamp.date(2023, 5, 1);
    }
  }
}
In our case, we wish to restrict access to the notes so that only the user who owns the notes can read the notes. That is, the user whose user id is the same as the userId field of the note should have access to specific notes. To do this, we still continue monitoring the cloud firestore database, as follows.
rules_version = '2';
service cloud.firestore {
  match /databases/{database}/documents {

  }
}
But add additional restrictions on the database path /notes for the specific notes.
rules_version = '2';
service cloud.firestore {
  match /databases/{database}/documents {
    match /notes/{noteId} {

    }
  }
}
Now, all the database requests that are made to the path /notes will be evaluated by the rules that we specify. The rules can use both information from the request — such as user id (in request.auth.uid) and information from the database — such as the userId of a specific note (in resource.data.userId). Granting access to a specific note is done by allowing access to the said resource, if it matches specific rules. Below, we grant the user the access to read and delete notes that they own.
rules_version = '2';
service cloud.firestore {
  match /databases/{database}/documents {
    match /notes/{noteId} {
      allow read, delete: if request.auth != null && request.auth.uid == resource.data.userId;
    }
  }
}
The above security rule works already quite well, but we cannot presently create new notes. To accommodate for this, we’ll add another rule that allows creation only if the data in the request contains a userId field that matches the user id of the user making the request. With this modification, the rules would be as follows.
rules_version = '2';
service cloud.firestore {
  match /databases/{database}/documents {
    match /notes/{noteId} {
      allow read, delete: if request.auth != null && request.auth.uid == resource.data.userId;
      allow create: if request.auth != null && request.auth.uid == request.resource.data.userId;
    }
  }
}
Save the above rule to the database, and try it out.
Now, authenticated users can create notes if the
userIdfield in the request matches the user id of the user making the request. Similarly, the authenticated user can read and delete notes that they own.