State Management
Learning Objectives
- You understand the importance of maintaining state on the client.
- You know how to share state between islands in an islands architecture.
- You know how to maintain state over multiple pages.
- You know of issues related to rendering and state management and know how to mitigate them.
Server- and client-side state
As a rule of thumb, when building scalable web applications, maintaining state on the server should be avoided. This means that approaches like session management with cookies that map the user to session data on the server should not be used.
The key problem with maintaining state on the server is that scaling the application horizontally becomes difficult, as users are tied to specific servers.
It is possible to use techniques like storing session data in a shared database or a cache, or to have the load balancer study the request and distribute requests based on cookie data.
The primary way to create stateful web applications while keeping the server stateless is offloading state to the client. This means that the client is responsible for maintaining the state, while the server is simply responsible for serving requests.
The most common example for offloading state to the client is to use JSON Web Tokens (JWT) for authentication and authorization. The server issues a token to the client, which is then used to authenticate the client in subsequent requests. The token contains the necessary information for the client to maintain its state — the server simply validates the token.
When using JWTs, the token is typically stored in localstorage, session storage, or a cookie. Regardless of the approach, the token is then included in each request to the server, which validates the token and serves the request.
Client-side state and islands
When working with islands architecture, where each island can come from a different source, including a different UI framework, maintaining state can be challenging. In effect, with different UI frameworks, each island could potentially even have its own state management system.
This leads to a situation, where the each island can have its own isolated state, as shown in Figure 1 below.
The above situation is not something to aim for, as it also means that the islands are not able to communicate with each other. For example, if the island in the main part of an application would include operations to manipulate a state, while the header would include a view to the state that should be updated based on the operations in the main part, the header would not receive updates.
To concretely illustrate the above example, modify the hello-blog.mdx file to include two copies of the FirstSvelteComponent component.
---title: Hello, World!---
import FirstSvelteComponent from "../../components/FirstSvelteComponent.svelte";
# Hello, World!
Hello, my beautiful blog!
<FirstSvelteComponent client:load />
<FirstSvelteComponent client:load />
Now, when you open the blog, you will see two islands, each with their own state. When you click the button in one island, the other island is not updated. This is illustrated in Figure 2 below.
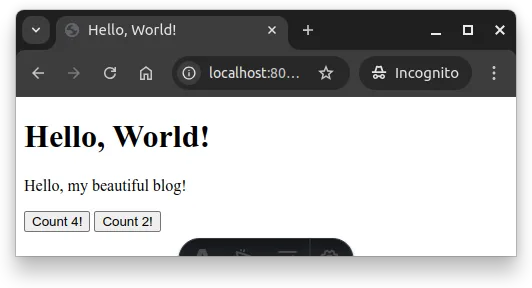
If we would wish that the changes in one island would be reflected in the other island, we would need to share the state between the islands. This would be done by creating a shared state, illustrated in Figure 3 below.
With the shared state, the islands can communicate with each other, and changes in one island are reflected in the other island. When you think of sharing state between components as discussed in the Web Software Development course, the same principles apply to islands architecture: the key is to create a shared state that is accessible the parts of the application that need to access the state.
The concrete implementation of sharing the state depends on the UI framework used in the islands — if there’s just one UI framework, we can use the state management system provided by the framework. If there are multiple frameworks, we need to use a shared state management system that works across the frameworks.
In our case, as we’re going to stick with Svelte, we can use Svelte’s state management system. In the case of using multiple UI frameworks, Astro recommends using nanostores.
State and Svelte
In Svelte, the approach for creating a shared state involves Svelte’s built-in reactivity system, which allows monitoring and reacting to changes in a stateful variable. Stateful variables are created using the $state rune, which creates a reactive variable that can be used in components.
We’ve already used a stateful variable in the first svelte component, which looked as follows.
<script>  let count = $state(0);</script>
<button onclick={() => count++}>Count {count}!</button>
To share a stateful variable between components, the state is created in a separate file, which is then imported into the components that need to access the state. As the $state rune needs to be processed by Svelte’s compiler, it cannot be used in normal .js files. Instead, the state needs to be created in a file processed by the Svelte compiler, such as a .svelte file or a .svelte.js file.
The simplest shared state is an object that contains the stateful variable. Create a folder called states to the folder src of the client-side project. In the states folder, create a file called countState.svelte.js, and place the following in it.
export const countState = $state({ count: 0,});Now, modify the FirstSvelteComponent.svelte to use the state. Import the state into the component, and use the state in the component.
<script> import { countState } from "../states/countState.svelte.js";</script>
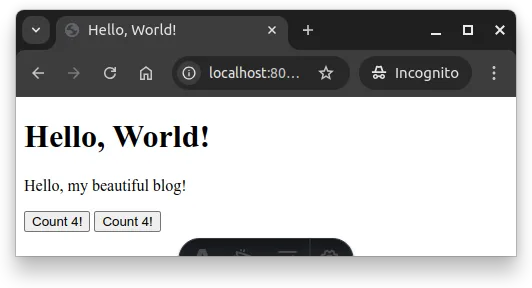
<button onclick={() => countState.count++}>Count {countState.count}!</button>Now, when you open up the blog and click the button in one of the islands, the other island is updated as well. This is because both islands are using the same state, which is shared between the islands. This is illustrated in Figure 4 below, where the counts in both buttons are the same.
When you contrast the approach that we took above with the approach we used to share state between components in the Web Software Development course, the key difference is that we did not wrap the state in a function for manipulating it. Instead, we wrapped it in an object.
With the approach from the Web Software Development course, the state would have been created as follows.
let countState = $state(0);
const useCountState = () => {  return {    get count() {      return countState;    },    increment: () => countState++,  };};
export { useCountState };
And used as follows.
<script>  import { useCountState } from "../states/countState.svelte.js";  const countState = useCountState();</script>
<button onclick={() => countState.increment()}>Count {countState.count}!</button>
Both approaches — exposing the state have their benefits. The former is simpler, while the latter is more flexible, as it is easier to build on.
Maintaining state over multiple pages
In both approaches presented above, the state is maintained in memory. This means that when the page is reloaded, including when the user navigates to another page within the application, the state is lost. To maintain the state over reloads, the state needs to be persistently stored, using e.g. local storage or session storage.
When we think of the first approach, where the stateful variable is stored in an object, there is no centralized location for storing the state to a persistent store when the state changes. In other words, if state changes are done within components that use the state, persisting the state changes would have to be done on a component basis, which is not ideal.
In the second approach, where state changes are done through a function, storing the state to a persistent store can be done in the function that changes the state, and loading the state from the persistent store can be done when taking the state into use. With local storage, this could look as follows.
let countState = $state(0);
const useCountState = () => {  countState = localStorage?.getItem("countState") || 0;
  return {    get count() {      return countState;    },    increment: () => {      countState++;      localStorage.setItem("countState", countState);    },  };};
export { useCountState };Flash of default state
When a page that has components with persistent state is loaded, the components with the persistent state are initially shown with default values. After a moment, the state is changed to correspond to the one in the persistent storage.
This phenomenon is similar to flash of unstyled content (FOUC) that comes from HTML initially rendered without styles, and only then applying the styles. While in the case of FOUC, the content is initially shown without styles, in the case of the flash of default state, the content is initially shown with default state, and only then the state is changed to correspond to the one in the persistent storage.
It is possible to avoid flash of default state by ensuring that the state is loaded before the component is rendered. With Astro, this can be done by using the client:only attribute, which instructs to render the component only on the client.
Try modifying the hello-blog.mdx file to include the client:only attribute for the FirstSvelteComponent component as follows.
---title: Hello, World!---
import FirstSvelteComponent from "../../components/FirstSvelteComponent.svelte";
# Hello, World!
Hello, my beautiful blog!
<FirstSvelteComponent client:visible />
<FirstSvelteComponent client:visible />
Now, when you open the blog, the values are loaded from the persistent store before the components are rendered and the initial values are not briefly shown.
This approach, however, has its own problems. The components are initially not shown at all, and they appear only after the state has been loaded and they have been rendered. This means that the layout that is initially shown can differ from the layout that is shown after the components are rendered on the client.
In addition, if the components contain content that is relevant for search engines, indexing the content properly requires that the search engine crawlers can interpret JavaScript. If not, the content is not indexed.
In addition to the two approaches — (1) prerendering and showing a default state at the beginning and (2) loading the component only on the client — there’s a third option. The third option is to use a loading spinner or some other type of an indicator that highlights that the content is being loaded. This way, the user knows that content is being loaded, and the content is shown only when it is ready to be shown.
As Astro (and Svelte) use Vite as a part of the tooling, we can access Vite’s environment variables that provide information on where the application is running. The build-time constant import.meta.env.SSR tells if the build is happening on the server. With it, we can — for example — set the state as null (or some other value) — when the rendering is done on the server, while otherwise use the intended value.
let countState = $state(0);
const useCountState = () => {  if (import.meta.env.SSR) {    countState = null;  } else {    countState = localStorage?.getItem("countState") || 0;  }
  return {    get count() {      return countState;    },    increment: () => {      countState++;      localStorage.setItem("countState", countState);    },  };};
export { useCountState };
Now, when the state is null, we know that we are pre-rendering the content on the server. This information can then be used to show specific kind of content to the user. As an example, with the following, the initial count would be shown as ”◌”. To see the effect, switch the directives in hello-blog.mdx back to client:load.
<script>  import { useCountState } from "../states/countState.svelte.js";  const countState = useCountState();</script>
<button onclick={() => countState.increment()}>  Count {countState.count ?? "◌"}!</button>
More commonly, the initial count would be styled. As an example, Tailwind has a set on animations that could be used to create a pulsing field (e.g. like ” ”) that could be used as the initial value, and then replaced with the actual value.
Styling is discussed in the Web Software Development course in the part on Pages, Layouts, and Styles. TailwindCSS that is used in the Web Software Development course can be also added to Astro.
In this course, we omit styling of applications, focusing on scalability. When choosing CSS tooling that scale, it is sensible to pick such that include functionality for minimizing styles including removing unused CSS, like TailwindCSS.