Content Collections
Learning Objectives
- You understand the need to separate content from the presentation layer.
- You know what content management systems are and know of headless CMSs.
- You know how to use Astro’s content collections.
Content is king
In 1996, Bill Gates popularized the statement “Content is king” as a part of an essay that focused on the opportunities of the internet. The essay included the following passages:
One of the exciting things about the Internet is that anyone with a PC and a modem can publish whatever content they can create. In a sense, the Internet is the multimedia equivalent of the photocopier. It allows material to be duplicated at low cost, no matter the size of the audience.
The Internet also allows information to be distributed worldwide at basically zero marginal cost to the publisher. Opportunities are remarkable, and many companies are laying plans to create content for the Internet.
The essay did not limit content to written text or images, but also included software:
When it comes to an interactive network such as the Internet, the definition of “content” becomes very wide. For example, computer software is a form of content-an extremely important one.
And highlighted the need to provide up-to-date and interactive content:
If people are to be expected to put up with turning on a computer to read a screen, they must be rewarded with deep and extremely up-to-date information that they can explore at will. They need to have audio, and possibly video. They need an opportunity for personal involvement that goes far beyond that offered through the letters-to-the-editor pages of print magazines.
The essay also continues to highlight the possibility of being paid for the content, discussing that advertising is not yet ready but can work in the long term, while the short-term solution could be micropayments:
For the Internet to thrive, content providers must be paid for their work. The long-term prospects are good, but I expect a lot of disappointment in the short-term as content companies struggle to make money through advertising or subscriptions. It isn’t working yet, and it may not for some time.
[…]
In the long run, advertising is promising. An advantage of interactive advertising is that an initial message needs only to attract attention rather than convey much information.
[…]
But within a year the mechanisms will be in place that allow content providers to charge just a cent or a few cents for information. If you decide to visit a page that costs a nickel, you won’t be writing a check or getting a bill in the mail for a nickel. You’ll just click on what you want, knowing you’ll be charged a nickel on an aggregated basis.
While in the end, micropayments did not become the norm, the essay correctly predicted the rise of content on the internet and the need for up-to-date and interactive content.
Separating content from presentation
As applications have more content, building the content into the application codebase becomes less and less maintainable. To keep an application with much content maintainable, the content should be separated from the presentation layer (e.g., Svelte and Astro components).
This separation allows content to be updated without having to make changes to the codebase. It also makes it easier to manage content across multiple platforms and devices. Separating content from the presentation layer is a common practice in web development and is often done using content management systems (CMS) or headless CMSs.
Content management systems are software applications that allow users to create, manage, and publish digital content. They are often used to create websites, blogs, and other online platforms. Content management systems typically include features such as content creation, content editing, and content publishing. A headless CMS is a type of content management system that separates the content from the presentation layer. This allows developers to use the content in different ways, such as in web applications, mobile apps, and other digital platforms.
It is also possible to separate the content from presentation by simply storing the content in a structured format, such as JSON, YAML, or Markdown. This allows the content to be easily accessed and updated without having to make changes to the codebase.
Content collections in Astro
In Astro, structured content is stored in content collections. Here, we walk through creating and using a content collection in Astro.
Markdown eXtended
Here, we look into using MDX as content. MDX (Markdown eXtended) is a format that lets you include JSX code in Markdown documents, which allows e.g. embedding Svelte components to the files.
MDX pages consist of a frontmatter section, enclosed in three dashes (---). The frontmatter section contains metadata about the page, such as the title. The content of the page follows the frontmatter section.
Here’s an example of an MDX page with a title as metadata and some content:
---
title: Hello, World!
---

# Hello, World!

Hello again!
The above would correspond roughly to the following HTML:
<h1>Hello, World!</h1>
<p>Hello again!</p>
Adding MDX support
First, in the client folder of the walking skeleton, run the following command:
deno install npm:@astrojs/mdxThis installs the Astro MDX plugin, which allows you to use MDX files as content in Astro. Then, modify the astro.config.mjs file to include the MDX plugin:
import { defineConfig } from "astro/config";
import svelte from "@astrojs/svelte";
import mdx from "@astrojs/mdx";
import deno from "@deno/astro-adapter";

export default defineConfig({
  adapter: deno(),
  integrations: [svelte(), mdx()],
});
Adding MDX content
Next, create a folder called content in the src folder. Inside the content folder, create another folder called blog. Inside the blog folder, create a file called hello-world.mdx with the following content:
---
title: Hello, World!
---

# Hello, World!

Hello, my beautiful blog!
And another file called my-impressive-entry.mdx with the following content:
---
title: My Impressive Entry
---

# My Impressive Entry

This is my impressive entry. It's so impressive!
Now, the folder src/content/blog should have two files: hello-world.mdx and my-impressive-entry.mdx.
Defining a content collection
To use the content from the blog folder, we need to define it as a content collection. Create a file called content.config.js and place it to the src folder of the client project. Add the following content to the file:
import { defineCollection, z } from "astro:content";
import { glob } from "astro/loaders";

const blog = defineCollection({
  loader: glob({ pattern: "**/*.mdx", base: "./src/content/blog" }),
  schema: z.object({
    title: z.string(),
  }),
});

export const collections = { blog };
The above definition creates a collection called blog, reading all the .mdx files from the src/content/blog folder. The schema defines that each file in the collection should have a title field of type string.
The schema definition is optional, but it’s a good practice to define it to ensure that the content is in the expected format. The schema is defined using Zod, which we briefly looked into in the Web Software Development Course.
Although here, we use content from the local file system, the data could also be loaded from a third-party service, such as a headless CMS.
Creating pages from a content collection
In Astro, pages are defined under src/pages. The pages and folders under src/pages do not have to reflect the structure of content collections, as the pages can be created dynamically. However, for simplicity and ease of debugging, it’s often a good idea to keep the structure similar.
Create a folder called blog under src/pages. Inside the blog folder, create a file called [id].astro. We’ll use the file to dynamically create pages for each blog entry. Add the following content to the file:
---
import { getCollection, render } from "astro:content";

export const getStaticPaths = async () => {
  const blogEntries = await getCollection("blog");

  return blogEntries.map((entry) => ({
    params: {
      id: entry.id?.replace(".mdx", ""),
    },
    props: {
      entry,
    },
  }));
};

const { Content } = await render(Astro.props.entry);
---

<Content />
The above code exposes a getStaticPaths function that returns a list of blog entries consisting of parameters and properties. The parameters are used for creating the content paths (the id parameter corresponds to the id in filename [id].astro), while the properties are used for the concrete content. We replace the “.mdx” suffix from the id to get a cleaner URL — this should be handled by Astro, but at least in 5.3.0 this seems to be needed.
We looked into the
getStaticPathsfunction in the previous part of the course, when exploring how astro handles routes and rendering.
The properties are available for each generated page, where the code for the each individual page is under the getStaticPaths function. In the above example, the page-specific functionality includes rendering the content of the blog entry (received as a property from the getStaticPaths function) using the render function.
The render function returns the content of the blog entry, in a Content component, which is then rendered in the page.
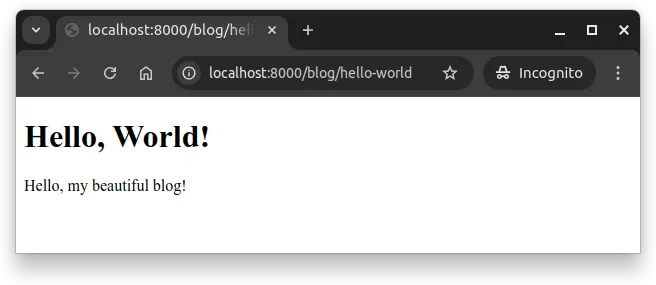
With the above functionality in place, you can now access the blog entries by their filenames (ids), e.g. http://localhost:8000/blog/hello-world and http://localhost:8000/blog/my-impressive-entry.
Figure 1 below shows the Hello, World! blog entry.

The frontmatter of the MDX files are in the data property of the entry. For example, if we would want to display the frontmatter entry title, we would access it through Astro.props.entry.data.title on the page.
---
import { getCollection, render } from "astro:content";

export const getStaticPaths = async () => {
  // returning a collection of blog entries for Astro
};

const { Content } = await render(Astro.props.entry);
---

<Content />

<p>The title in frontmatter was {Astro.props.entry.data.title}.</p>
The frontmatter could be passed to a layout, which the content would be rendered into. The layout could then e.g. include the title in the head element of the page. Or, the page itself could contain the HTML “template”, as follows.
---
import { getCollection, render } from "astro:content";

export const getStaticPaths = async () => {
  // returning a collection of blog entries for Astro
};

const { Content } = await render(Astro.props.entry);
---

<!DOCTYPE html>
<html lang="en">
<head>
  <meta charset="UTF-8">
  <title>{Astro.props.entry.data.title}</title>
</head>
<body>
  <Content />
</body>
</html>
Listing entries in a content collection
In the above example, we created individual pages out of the content collection with the help of the getStaticPaths function. Often, one might also want to list the entries in a collection, for example, to create an index page. In such a case, we do not need to create individual pages for each entry, but instead, we can list the entries in a single page.
Create a file called index.astro and place it to the src/pages/blog folder. Add the following content to the file:
---
import { getCollection } from "astro:content";

const blogEntries = await getCollection("blog");
---

<h1>Blog entries</h1>

<ul>
  {
    blogEntries.map((entry) => (
      <li>
        <a href={`/blog/${entry.id?.replace(".mdx", "")}`}>
          {entry.data.title}
        </a>
      </li>
    ))
  }
</ul>
Above, we read the collection and then iterate over the entries, creating a list of links to the individual blog entries. The entry.id is used to create the path to the individual blog entries, while entry.data.title from the frontmatter is used as the link text.
The syntax for looping is similar to JavaScript, but with the difference that the code is enclosed in curly braces
{}and the output is wrapped in parentheses().
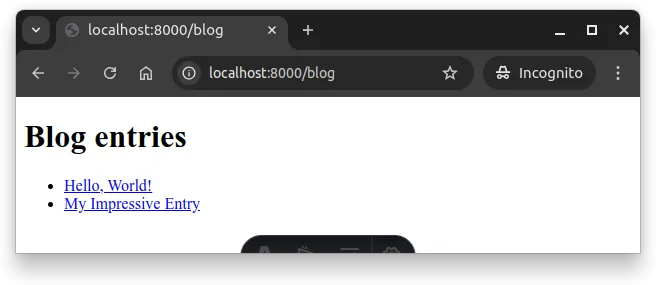
With the above, the page at http://localhost:8000/blog will list the blog entries, with links to the individual entries. Figure 2 below shows the list of blog entries.
