Getting Started with Astro
Learning Objectives
- You know what Astro is and you can create and integrate Astro components, layouts, and file-based routes to build dynamic web pages.
Astro is a static site generator that hybrid rendering. We set up Astro already when setting up the Walking Skeleton. In these examples, we assume that Astro is in the client folder of the walking skeleton, as outlined in the walking skeleton example.
In the Walking Skeleton part, installing Astro installed Astro’s version 5.1. — or some other version, depending on when you created the walking skeleton. From hereon, we are using version 5.3. To upgrade the Astro project to the version, run the following command in the client folder of the project.
deno install npm:astro@5.3.0After upgrading Astro’s version, modify the file index.astro in client/src/pages to match the following.
---import Layout from "../layouts/Layout.astro";---
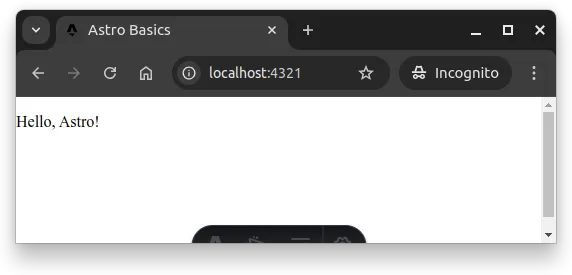
<Layout> <p>Hello, Astro!</p></Layout>Now, start the walking skeleton using docker compose up --build, and navigate again to http://localhost:4321. You should see the text “Hello, Astro!” on the page, similar to the one shown in Figure 1 below.
Load balancer
When discussing Traffic Distribution and Load Balancing, we set up a Traefik load balancer for our server-side API. It is sensible to use a load balancer for the client-side functionality as well, making it easier to scale the application when needed.
Let’s modify the compose.yaml file to first change the server-side API so that it uses the /api endpoint and then adjust the load balancer that the requests to the root of the application are directed to the client-side server.
First, modify the configuration of the server service as follows. The key change is in the traefik.http.routers.server-router.rule line, where we change the rule to use the /api endpoint.
server: build: server restart: unless-stopped volumes: - ./server:/app env_file: - project.env depends_on: - database - redis labels: - "traefik.enable=true" - "traefik.http.routers.server-router.entrypoints=web" - "traefik.http.routers.server-router.rule=PathPrefix(`/api`)" - "traefik.http.services.server-service.loadbalancer.server.port=8000"Now, queries to the endpoint http://localhost:8000/api should be directed to the server-side API. You can try this out by adding a new route to the server-side API, e.g.
app.get("/api", (c) => { return c.text("Hello new path!");});And then querying the endpoint.
curl localhost:8000/apiHello new path!%Note that the requests with the
/apiprefix are directed to the server-side API as is. That is, if a user makes a request to a path/api/some-path, the request is directed to the server-side API as/api/some-pathand not as/some-path.
Next, modify the client service in the compose.yaml file to use the Traefik load balancer. This involves adding the labels to enable traefik for the service, telling to use the web entrypoint, setting the rule to use the root path, and setting the port to 4321.
client: build: client restart: unless-stopped volumes: - ./client:/app labels: - "traefik.enable=true" - "traefik.http.routers.client-router.entrypoints=web" - "traefik.http.routers.client-router.rule=PathPrefix(`/`)" - "traefik.http.services.client-service.loadbalancer.server.port=4321"We also remove the port mapping 4321:4321 from the client service to hide the port from the outside world and to force accessing the service through the load balancer.
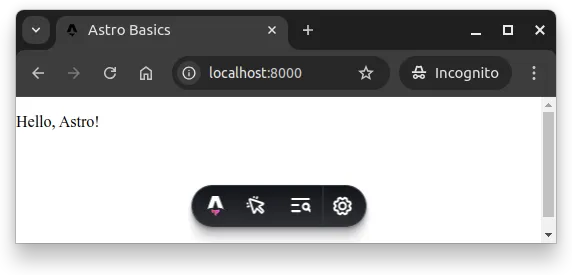
Now, when we restart the service and navigate to http://localhost:8000, we should see the same content as before at http://localhost:4321, but now the requests are directed through the load balancer. The response from the address http://localhost:8000 is shown in Figure 2.
At the same time, if we would query the path http://localhost:4321, we no longer receive a response, as there is nothing running at the port.
curl localhost:4321curl: (7) Failed to connect to localhost port 4321 after 0 ms: Connection refusedWith the load balancer acting as an entrypoint to the application, the client- and the server-side functionality is on the same server from the perspective of the client. This e.g. removes the need for CORS headers.
In addition, many client-side frameworks wrap the Fetch API, dropping the need to include the server address to the fetch function. This works typically only if the client and the server are running on the same server.
And, not to forget, the load balancer allows us to scale the number of both client- and server-side servers as needed.
File-based Routing
Like SvelteKit, which we used in Web Software Development, Astro uses file-based routing, where each .astro file in the src/pages folder will be created as a page. As an example, consider the following file structure for the src/pages folder.
tree --dirsfirst.├── secret│ └── index.astro├── about.astro└── index.astroWith the above file structure, the following mapping would be used:
- Path
/would lead to showingindex.astro - Path
/aboutwould lead to showingabout.astro - Path
/about/would lead to showingabout.astro - Path
/secretwould lead to showingsecret/index.astro - Path
/secret/would lead to showingsecret/index.astro
That is, for example, if a user would visit the path /about, the user would be shown contents created based on the file about.astro.
The contents of the files are not shown directly. Astro compiles the files to pages when the web application is built.
Moving between the pages is done normally as with HTML pages, using the anchor element. As an example, the following content for index.astro has links to the root path, i.e. index.astro, and to the /about path, i.e. about.astro.
---import Layout from "../layouts/Layout.astro";---
<Layout> <p>Hello, Astro!</p> <ul> <li><a href="/">Main</a></li> <li><a href="/about">About</a></li> </ul></Layout>The files in src/pages is not limited to .astro files. Astro supports a range of files including Markdown, MDX, and HTML. For additional information, see Astro’s documentation on Supported page files.
Components
Files that end with the suffix .astro are considered Astro components. Astro components have the following structure, where the component-specific code written in JavaScript is at the top of the component to an area separated by three dashes, which is followed by template code that can include HTML, CSS, and JavaScript.
Creating and importing a component
Create a folder src/components to the client folder and add a file called Hello.astro to the folder. Place the following content to the file.
---// Component-specific code---
<p>Hello component!</p>
Component-specific code can include imports, variables, and functions that are used in the template code. As an example, we can modify the src/pages/index.astro to import the Hello component and use it in the template code. Imported components are used as custom HTML elements, similar to how Svelte components are used.
---import Layout from "../layouts/Layout.astro";import Hello from "../components/Hello.astro";---
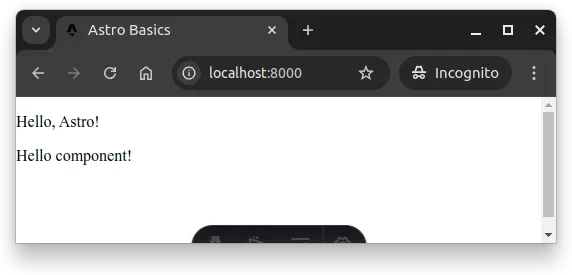
<Layout> <p>Hello, Astro!</p> <Hello /></Layout>When we access the page at the root path of the application, we now see the content from the Hello component shown on the page. The content should be similar to the one shown in Figure 3.
index.astro and the content in Hello.astro, i.e. “Hello component!”.When looking at the HTML that the server responds with, we see that the content from the Hello component is included in the HTML. That is, the content is not loaded dynamically, but the server renders the content before sending it to the client.
curl localhost:8000// ...<p data-astro-source-file="/app/src/pages/index.astro" data-astro-source-loc="7:6"> Hello, Astro!</p><p data-astro-source-file="/app/src/components/Hello.astro" data-astro-source-loc="5:4"> Hello component!</p>// ...The response also includes additional content, much of which would be removed in a production environment. The content is included to show where the content is coming from.
Component scripting and properties
The component script area can contain JavaScript and any variables declared in the script area are available when rendering the component. Below, the component has a variable greet with the value “component”. The variable is used as a part of the template, which leads the value being injected to the HTML.
---const greet = "component";---
<p>Hello {greet}!</p>
If you modify the Hello.astro to match the above and reload the page, you’ll notice that the response from the server still contains the text “Hello component!”. This highlights that the content in the component is rendered on the server.
curl localhost:8000// ...<p data-astro-source-file="/app/src/components/Hello.astro" data-astro-source-loc="5:4"> Hello component!</p>// ...Components can also be given properties. Properties given to a component are accessed through Astro.props. For example, the Hello.astro could take a property greet, which would then be used in the greeting. To use a property, we modify the Hello.astro as follows — below, the || is used to set a default value if the property does not exist.
---const greet = Astro.props.greet || "component";---
<p>Hello {greet}!</p>
Now, we can modify the index.astro that uses the above Hello component, and pass the greet property to it. Properties are entered like normal properties in HTML.
---import Layout from "../layouts/Layout.astro";import Hello from "../components/Hello.astro";---
<Layout>  <p>Hello, Astro!</p>  <Hello greet="property" /></Layout>
Now, the page shows the text “Hello property!” instead of “Hello component!”.
The properties are not limited to literals, but they can also have content that needs to be evaluated. In such a case, the value is given in curly brackets. Below, the value for the property greet property will end up being “property and 8”.
---import Layout from "../layouts/Layout.astro";import Hello from "../components/Hello.astro";---
<Layout>  <p>Hello, Astro!</p>  <Hello greet={`property and ${3 + 5}`} /></Layout>
Again, when we look at the HTML that the server responds with, the content is rendered on the server.
curl localhost:8000// ...<p data-astro-source-file="/app/src/components/Hello.astro" data-astro-source-loc="5:4"> Hello property and 8!</p>// ...Layouts and slots
Astro has a mechanism for defining and creating layouts. We already have a layout file Layout.astro in src/layouts, which looks something similar to the following.
<!doctype html><html lang="en">  <head>    <meta charset="UTF-8" />    <meta name="viewport" content="width=device-width" />    <link rel="icon" type="image/svg+xml" href="/favicon.svg" />    <meta name="generator" content={Astro.generator} />    <title>Astro Basics</title>  </head>  <body>    <slot />  </body></html>
<style>  html,  body {    margin: 0;    width: 100%;    height: 100%;  }</style>
The key element in an Astro layout is <slot />, which indicates the location to which the content from the file that uses the layout should be injected to. As an example, the index.astro file uses the layout, and the content from the file is injected to the layout through the <slot /> element.
Knowing about properties, we can — for example — adjust the layout so that it uses a property for the title of the page.
---const title = Astro.props.title || "My epic title";---
<!doctype html><html lang="en">  <head>    <meta charset="UTF-8" />    <meta name="viewport" content="width=device-width" />    <link rel="icon" type="image/svg+xml" href="/favicon.svg" />    <meta name="generator" content={Astro.generator} />    <title>{title}</title>  </head>  <body>    <slot />  </body></html>
<style>  html,  body {    margin: 0;    width: 100%;    height: 100%;  }</style>
Now, the pages that use the layout either have “My epic title” as the title, or they can pass the title as a property to the layout.
When defining layouts, it can be meaningful to divide the layout into multiple components, each with their own specific purpose. As an example, it could be meaningful to have a separarate component that handles navigation.
For navigation-specific components, we would create a separate folder components under the src/layouts folder, which would help to keep the layout components organized. Create the folder components under the src/layouts folder, and add a file called Navigation.astro to the folder.
Add the following content to the file.
<ul> <li><a href="/">Index page</a></li> <li><a href="/about">About page</a></li></ul>Now, to use the Navigation.astro in Layout.astro, we import the Navigation component and add it to the Layout component.
---import Navigation from "./components/Navigation.astro";const title = Astro.props.title || "My epic title";---
<!doctype html><html lang="en">  <head>    <meta charset="UTF-8" />    <meta name="viewport" content="width=device-width" />    <link rel="icon" type="image/svg+xml" href="/favicon.svg" />    <meta name="generator" content={Astro.generator} />    <title>{title}</title>  </head>  <body>    <Navigation />    <slot />  </body></html>
<style>  html,  body {    margin: 0;    width: 100%;    height: 100%;  }</style>
When building the application, Astro by default merges the components together, leading to a combined entity with no need to retrieve each component separately in the client.
The same idea can be used to create more specific layouts. As an example, if we would have an admin area — or a secret area — we could have a different layout for it, and then just use that layout for the pages in the secret area.