Components and Properties
Learning Objectives
- You know how to pass properties to components.
- You know of the relationship between pages and components.
In the last chapter, when learning about dynamic route parameters, we learned that properties are accessed in Svelte pages using the $props() function.
In
+page.svelte, thedataproperty read via$props()comes from the page’sload()function. Regular child components do not get that data automatically: instead, you must pass properties to them explicitly.
Here, we look into passing properties to components.
Component properties
Properties allow passing data from a parent component to a child component. This is useful when we want to reuse a component in different contexts, but with different data.
Syntax and default values
The syntax for declaring properties is as follows — below, we declare a single property called name:
let { name } = $props();If there are multiple properties, they are separated using commas — below, we declare two properties, name and yearOfBirth:
let { name, yearOfBirth } = $props();If we want to declare a property with a default value, we can use the following syntax:
let { name = "John Doe" } = $props();Using properties in a component
The properties can be used like any other variable in the component. For example, if we have a property called name, we can use it in the HTML template of the component as follows:
<script>  let { name } = $props();</script>
<h1>Hello, {name}!</h1>
Passing properties
The properties are passed to a component when the component is used. For example, if we have a component called Greeting.svelte that has a property called name, we can pass the property as follows:
<script>  import Greeting from "$lib/components/Greeting.svelte";</script>
<Greeting name="Alice" />
Properties can also be passed using variables, and they can also be expressions. For example:
<script>  import Greeting from "$lib/components/Greeting.svelte";
  let userName = "Bob";  let isMorning = true;</script>
<Greeting name={userName} /><Greeting name={isMorning ? `tired ${userName}` : userName} />
Hello Props!
0 / 10 points
The assignment template comes with the contents of the src folder of a Svelte project (omitting app.html). There is a Svelte component called Hello.svelte. Add a property “message” to the component. The property should have the default value “world”. Change the component so that instead of “Hello world!”, it displays the text “Hello message!”, where message is the value of the property. Modify only the Hello.svelte file.
Components and pages
The relationship between components and pages is that pages are often built using components. A page can be thought of as a component that is rendered when the user navigates to a specific route. Components, on the other hand, are reusable pieces of code that can be used in multiple places in the application.
Pages in Svelte are also components, but they are special components that are rendered when the user navigates to a specific route.
When constructing an application, the page should be kept as simple as possible, and the logic should be mainly in components. This allows for better separation of concerns and makes the code easier to maintain.
Components and Pages
0 / 5 points
Which of the following statements correctly describe the relationship between components and pages in Svelte? (Select all that apply)
Let’s continue with the example we started in the last chapter, where we created a dynamic route for books and chapters. Here, we will create components for displaying the list of books and the details of a specific book, including its chapters.
Listing books
BookList component
First, create a folder called books to the folder src/lib/components. This folder will contain components related to books. Then, create a component called BookList.svelte and place it in the src/lib/components/books folder. This component will be used to display a list of books, each with a link to the book’s page.
Place the following content to the BookList.svelte file.
<script>  let books = $state([    { id: 1, name: "HTML for Hamsters" },    { id: 2, name: "CSS: Cannot Style Sandwiches" },    { id: 3, name: "JavaScript and the Fifty Shades of Errors" },  ]);</script>
<ul>  {#each books as book}    <li>      <a href={`/books/${book.id}`}>{book.name}</a>    </li>  {/each}</ul>
Books page
Next, modify the page src/routes/books/+page.svelte to use the BookList component — if you did not follow the example from the last part, create the file. The page +page.svelte should now look like this:
<script>  import BookList from "$lib/components/books/BookList.svelte";</script>
<h1>Books</h1>
<BookList />
Now, when you visit the path /books, you should see a list of books, each with a link to the book’s page. This is shown in Figure 1 below.
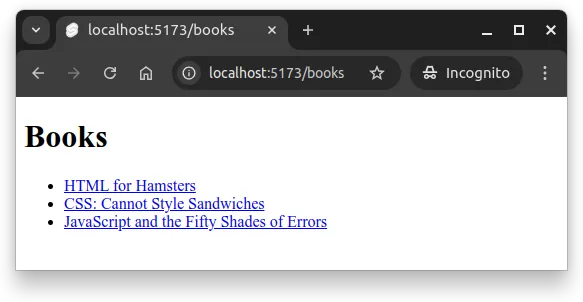
/books shows a list of books, each with a link to the page of a specific book.Showing an individual book
Book component
Now, create a component called Book.svelte and place it in the src/lib/components/books folder. Place the following content to the Book.svelte file.
<script>  let { bookId } = $props();  let bookChapters = {    1: [1, 2, 3],    2: [1, 2, 3, 4],    3: [1, 2, 3, 4, 5, 6],  };
  let chapters = bookChapters[bookId] || [];</script>
<h1>Book {bookId}</h1><ul>  {#each chapters as chapter}    <li>      <a href={`/books/${bookId}/chapters/${chapter}`}>Chapter {chapter}</a>    </li>  {/each}</ul>
The component accepts one property, bookId, which is used to display the book’s ID. The id is also used to decide which chapters to show for the book. For now, the chapters are stored in a simple object, where the key is the book ID, and the value is an array of chapter numbers.
Book page
Next, modify the src/routes/books/[bookId]/+page.svelte file to use the Book component. The page will now look like this:
<script>  import { page } from "$app/state";  import Book from "$lib/components/books/Book.svelte";</script>
<Book bookId={page.params.bookId} />
Now, when you navigate to the address /books/1, you should see the book with ID 1, and a list of chapters for that book. Similarly, when you navigate to /books/2, you should see the book with ID 2, and so on. This is shown in Figure 2 below.
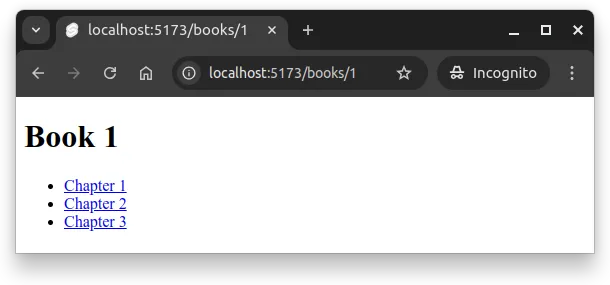
/books/1 shows the book with ID 1, and a list of chapters for that book.Separate chapter list component
We can further expand the example by introducing a separate component for displaying the list of chapters. This component will accept the property bookId. Create a component called ChapterList.svelte to the src/lib/components/books folder, and place the following content to the file.
<script>  let { bookId } = $props();  let bookChapters = {    1: [1, 2, 3],    2: [1, 2, 3, 4],    3: [1, 2, 3, 4, 5, 6],  };
  let chapters = bookChapters[bookId] || [];</script>
<ul>  {#each chapters as chapter}    <li>      <a href={`/books/${bookId}/chapters/${chapter}`}>Chapter {chapter}</a>    </li>  {/each}</ul>
Then, modify the Book.svelte component to use the ChapterList component. The modified Book.svelte file would look as follows:
<script>  import ChapterList from "$lib/components/books/ChapterList.svelte";  let { bookId } = $props();</script>
<h1>Book {bookId}</h1>
<ChapterList bookId={bookId} />
Now, when you navigate to the address /books/1, you should see the book with ID 1, and a list of chapters for that book, just like before. The only difference is that the chapter list is now rendered by the ChapterList component.
Summary
To summarize:
- Properties allow passing data from a parent component to a child component.
- Properties are declared using the
let { propertyName } = $props();syntax. - Properties are passed using the syntax
<Component propertyName={value} />. - Properties from dynamic route parameters can be passed to components.
Components for nested todos and tasks
0 / 25 points
Refactor your solution to the nested todos and tasks exercise from the last chapter to use components with properties, mimicking the above books example. Create four components called Task.svelte, TaskList.svelte, Todo.svelte, and TodoList.svelte under $lib/components/todos and use them inside the pages. The idea is that the pages themselves should only import and render components, while the logic and markup live in the components.
The expected components and the file structure is as follows:
.├── lib│ └── components│ └── todos│ ├── Task.svelte│ ├── TaskList.svelte│ ├── Todo.svelte│ └── TodoList.svelte└── routes ├── todos │ ├── [todoId] │ │ ├── tasks │ │ │ └── [taskId] │ │ │ └── +page.svelte │ │ └── +page.svelte │ └── +page.svelte └── +page.svelteImplement the individual components as follows:
-
TodoList.svelte- Has no properties.
- Has a main heading with text “Todos”.
- Has a list of todos as a variable. Each todo has an
idand aname. The todos should be as follows:[{ id: 1, name: 'First todo' },{ id: 2, name: 'Second todo' },{ id: 3, name: 'Third todo' }] - Renders the todos as a list, where each list item is a link to the corresponding todo page (e.g. /todos/1). Use the name of the todo as the link text.
- Import the
TodoList.sveltecomponent in the/todos/+page.sveltepage and use it to render the list of todos.
-
TaskList.svelte- Takes a property called
todoId(string). - Has an object that maps the todo ids to a list of tasks. Each task has an
idand aname. The object should be as follows:{1: [{ id: 1, name: 'First task of first todo' },{ id: 2, name: 'Second task of first todo' }],2: [{ id: 1, name: 'First task of second todo' },{ id: 2, name: 'Second task of second todo' }],3: [{ id: 1, name: 'First task of third todo' },{ id: 2, name: 'Second task of third todo' }]} - Renders the tasks for the given
todoIdas a list, where each list item is a link to the corresponding task page (e.g. /todos/1/tasks/1). Use the name of the task as the link text. - Note: route params are strings; either use string keys in the object or coerce with
Number(todoId)when indexing.
- Takes a property called
-
Todo.svelte- Takes a property called
todoId. - Has a main heading with text “Todo {todoId}”, where {todoId} is a property passed to the component.
- Imports and uses the
TaskList.sveltecomponent to render the list of tasks for the giventodoId.
- Takes a property called
-
Task.svelte- Takes properties called
todoIdandtaskId. - Has a main heading with text “Todo {todoId}, task {taskId}”, where {todoId} and {taskId} are properties passed to the component.
- Takes properties called
Use the components as follows:
/todos/+page.svelte: imports and rendersTodoList.svelte./todos/[todoId]/+page.svelte: imports and rendersTodo.svelte, passestodoIdto Todo using the page object available from “$app/state”./todos/[todoId]/tasks/[taskId]/+page.svelte: imports and rendersTask.svelte, passestodoIdandtaskIdto the components from the page object available from “$app/state”.
Once ready, zip the contents of the folder client/src and return the zip here. The zip should not contain the client/src folder, but the contents of the client/src folder.