Svelte Components
Learning Objectives
- You know how Svelte components are created and you know how to add them to an application.
Svelte Components
A component in Svelte is a self-contained piece of code that can be reused in different parts of the application. Each component consists of three optional parts: script, HTML template, and style. The script part contains the JavaScript logic of the component, the HTML template part contains the structure of the component, and the style part contains the styling of the component.
<script>
  // JavaScript goes here
</script>

<!-- HTML template goes here -->

<style>
  /* CSS goes here */
</style>
Any of the three parts are optional, and a component can e.g. be created without the script part and without the style part.
When adding the Svelte Client-side Application to our Walking Skeleton, we already created a component called Message. The component was placed under a folder called components that was created in the src/lib folder of the project, and it had the following content.
<script>
  import { PUBLIC_API_URL } from "$env/static/public";
  let message = $state("");

  const fetchMessage = async () => {
    const response = await fetch(PUBLIC_API_URL);
    const data = await response.json();
    message = data.message;
  };
</script>

<button onclick={fetchMessage}>Fetch message</button>

<p>Message is: {message}</p>
Then, we imported the component to the src/routes/+page.svelte file and added the component to the HTML template area of the file.
<script>
  import Message from "$lib/components/Message.svelte";
</script>

<Message />
With this, with the server-side application up and running, we were able to fetch a message from the server and display it in the browser. The message was fetched when the button was clicked. Let’s take a step back, and start from the beginning with creating a new component.
Creating and Using Components
Create a file called Header.svelte to the folder src/lib/components of the client-side project, and place the following content to the file. The component has only the HTML template part, and it contains an h1 element with the text “Hello Svelte World!”.
<h1>Hello Svelte World!</h1>The lib folder is a special folder that can be referred to as $lib when importing components. Placing components in the lib folder means that we do not have to remember the directory depth (and consequently the amount of ../’s in the import).
To use the component, we need to import it to the application. Open the src/routes/+page.svelte file. If you followed the walking skeleton, the contents of the file should look something like the following.
<script>
  import Message from "$lib/components/Message.svelte";
</script>

<Message />
The file +page.svelte is also a component. It has a script part that imports the Message component, and an HTML template part that contains the Message component. The HTML template part in Svelte components is not restricted to pure HTML, but it can contain other components as well. When the application is opened in the browser, the Message component is displayed on the page.
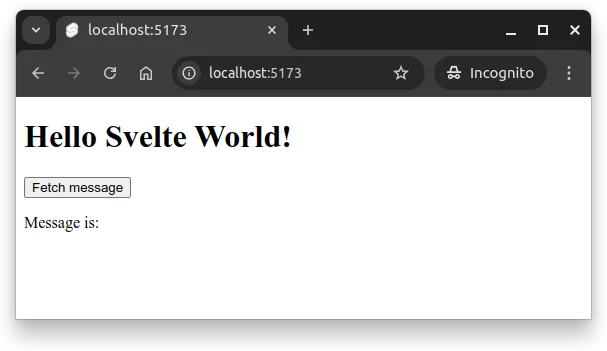
To add the Header component to the application, we need to import the component to the src/routes/+page.svelte file. Open the file and add an import statement for the Header component.
<script>
  import Header from "$lib/components/Header.svelte";
  import Message from "$lib/components/Message.svelte";
</script>

<Message />
To use a component, we need to add the component to the HTML template part. As the name of the new component is Header, it is added to the HTML template area as <Header />.
<script>
  import Header from "$lib/components/Header.svelte";
  import Message from "$lib/components/Message.svelte";
</script>

<Header />
<Message />
Now, when we open the application in the browser, we should see the component being displayed on the page, as shown in Figure 1.
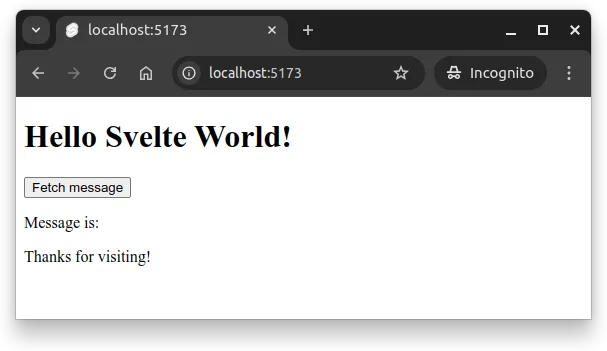
Let’s continue by creating another component called Footer. Create a file called Footer.svelte to the src/lib/components folder, and place the following content to the file. The component has only the HTML template part, and it contains an footer element with the text “Thanks for visiting!”.
<footer>
  <p>Thanks for visiting!</p>
</footer>
With the component in place, add it again to the src/routes/+page.svelte file, placing it at the bottom. The file should now look like the following.
<script>
  import Footer from "$lib/components/Footer.svelte";
  import Header from "$lib/components/Header.svelte";
  import Message from "$lib/components/Message.svelte";
</script>

<Header />
<Message />
<Footer />
With the newly created footer, the application should now display the header, the message, and the footer when opened in the browser. The application should look like the one shown in Figure 2.