Template Logic
Learning Objectives
- You know of Svelte’s template logic.
Svelte components also allow adding logic into them. This allows displaying variable values, displaying different content based on conditions, and looping over collections of data. To test out basic template logic, create a new component called LogicTesting.svelte, and place it into the src/lib/components folder. At first, place the following content to the component.
<h1>Hello!</h1>Now, modify the component at src/routes/+page.svelte to import the LogicTesting component and to show it. To avoid any misconceptions on what is showed based on which component, we remove the other components from the file, showing just the LogicTesting component.
<script>
  import LogicTesting from "$lib/components/LogicTesting.svelte";
</script>

<LogicTesting />
When the application is opened in the browser, the text “Hello!” should be displayed on the page. Let’s next add a bit of logic to the LogicTesting component.
The name “LogicTesting” is used to indicate that the component is used for testing logic. The component name needs to always reflect the purpose of the component.
Showing variable values
The script area of components can contain JavaScript code. It can, for example, be used to declare variables. In the following, we declare two variables called “name” and “version”.
<script>
  let name = "Svelte";
  let version = 5;
</script>

<h1>Hello!</h1>
Variable values can be injected to the HTML part of a component using braces {}, where the variable name is placed inside the curly brackets. The following example shows how to display the variable name in the HTML part of the component.
<script>
  let name = "Svelte";
  let version = 5;
</script>

<h1>Hello {name}!</h1>
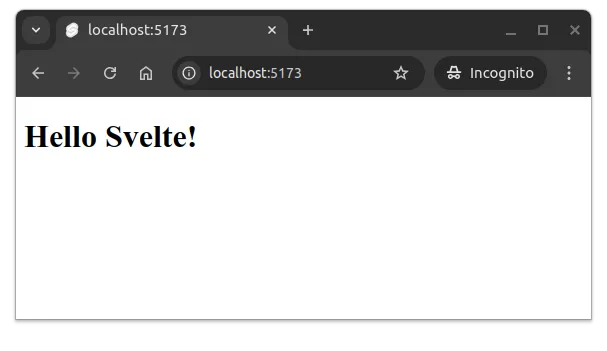
With the above component, the application would look similar to the one shown in Figure 1. The value of the variable name is injected to the page, displaying the text “Hello Svelte!”.

Inline expressions
Curly brackets {} can also be used to inject JavaScript expressions to the HTML part of a component. The following example shows how to display the value of the variable version multiplied by 2.
<script>
  let name = "Svelte";
  let version = 5;
</script>

<h1>Hello {name}! The version is {version * 2}.</h1>
The above component would show the text “Hello Svelte! The version is 10.” in the browser.
An inline expression is a piece of code written directly within curly braces
{}in a template, used to display or manipulate data dynamically, such as{version * 2}or{version === 5 ? 'Yes' : 'No'}.
Inline expressions may also contain method calls. As an example, the following component calls the toUpperCase method of the String variable name.
<script>
  let name = "Svelte";
  let version = 5;
</script>

<h1>Hello {name.toUpperCase()}! The version is {version * 2}.</h1>
Now, the text “Hello SVELTE! The version is 10.” is displayed in the browser.
Logic blocks
Svelte comes also with the possibility to add logic to the components through the use of logic blocks. Logic blocks include conditional blocks, looping blocks, and blocks used to wait for completion of asynchronous functions.
Logic blocks are written using curly braces {}, similar to above. The start of a block is identified by {#, the block keyword, an optional expression, and }. The end of template logic is closed with {/, the block keyword, and }. The basic syntax is as follows.
{#block-keyword expression}
  content
{/block-keyword}
Conditional rendering
Conditional rendering can be used to show different content based on conditions. The block keyword for conditional rendering is if. The following outlines the basic syntax of conditional rendering.
{#if expression}
  content
{/if}
If the expression evaluates to true, the content is rendered. Otherwise, the content is not rendered.
As an example, the following component shows the text “Great choice!” if the value of the variable version is 5.
<script>
  let name = "Svelte";
  let version = 5;
</script>

<h1>Hello {name}!</h1>

{#if version === 5}
  <h1>Great choice!</h1>
{/if}Similar to conditional statements in programming in general, there exists also the possibility for else and else if branches. Both else and else if branches begin with a colon :. The following outlines the basic syntax of conditional rendering with else and else if branches.
{#if expression}
  content
{:else}
  content
{/if}{#if expression}
content
{:else if expression}
content
{:else}
content
{/if}Drawing these together, the following component shows different messages based on the value of the variable version.
<script>
  let name = "Svelte";
  let version = 5;
</script>

<h1>Hello {name}!</h1>

{#if version === 5}
  <h1>You've picked the version {version}. Great choice!</h1>
{:else if version < 5}
  <h1>Your version is {version}. Time to update it!</h1>
{:else}
  <h1>Your version is {version} -- you are from the future!</h1>
{/if}
With the above, if the value of version is 5, the text “You’ve picked the version 5. Great choice!” is shown. For values smaller than 5 and greater than 5, different messages are displayed. As an example, if the value is 4, the text “Your version is 4. Time to update it!” is displayed. Similarly, if the value is 6, the text is “Your version is 6 — you are from the future!”.
Looping over collections
Collections are looped over using the each block, which is given the name of a variable that holds a collection of values, the keyword as, and the name of the variable that is used for holding individual values from the collection within the loop.
As an example, if we would have a variable called list, we could create a paragraph of each item in the list item as follows.
{#each list as item}
<p>{item}</p>
{/each}
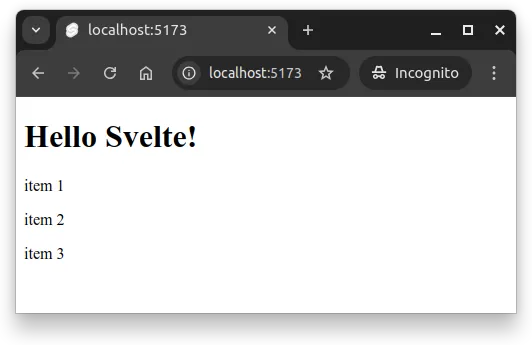
Let’s modify the LogicTesting.svelte component, add a list of items to it, and render the items. In the following, the component would show the heading “Hello Svelte!” and three paragraphs, each containing an item from the list.
<script>
  let name = "Svelte";
  let version = 5;
  let list = ["item 1", "item 2", "item 3"];
</script>

<h1>Hello {name}!</h1>

{#each list as item}
  <p>{item}</p>
{/each}
With the above component, the application would look similar to the one shown in Figure 2.

Working with objects
Objects are also variables and they can be used in the same way as other variables. As an example, we could have an object that contains the name and version of a library, and have a component show the name of the library.
<script>
  let library = { name: "Svelte", version: 5 };
</script>

<h1>Hello {library.name}!</h1>
The above would show the text “Hello Svelte!” in the browser.
The key thing to remember when working with objects is to use the dot notation to access the properties of the object — in the case of the above example, e.g. library.name. Just writing {library} would show the object itself, not e.g. the value of the property name, while writing {name} would result in an error, as the variable name is not defined.
The logic blocks if and each can also be used to work with objects. As an example, the following component contains a list of todo items, where each item has an identifier, a name, and an indicator of whether the todo is done or not.
<script>
  let name = "Svelte";
  let version = 5;
  let todos = [
    { id: 1, name: "Learn Deno basics", done: true },
    { id: 2, name: "Learn Hono basics", done: true },
    { id: 3, name: "Learn Svelte basics", done: false },
  ];
</script>

<h1>Hello {name}!</h1>
To render the todo items, we can use the each block. Now, however, when iterating over the todo items, each item would be an object, and we would need to use the properties of the object in the template. The following example shows how to create an unordered list of the names of the todo items.
<script>
  let name = "Svelte";
  let version = 5;
  let todos = [
    { id: 1, name: "Learn Deno basics", done: true },
    { id: 2, name: "Learn Hono basics", done: true },
    { id: 3, name: "Learn Svelte basics", done: false },
  ];
</script>

<h1>Hello {name}!</h1>

<ul>
  {#each todos as todo}
    <li>{todo.name}</li>
  {/each}
</ul>
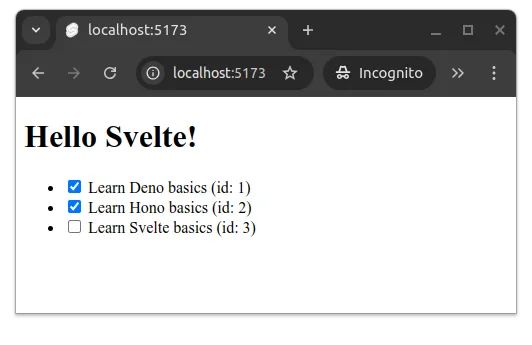
Similarly, we could also use other information from the todo item, including the identifier and whether the todo is done or not. In the following, the list has a checkbox that indicates whether the todo is done, the name of the todo, and the identifier of the todo. In addition, the identifier is used as the id attribute of the checkbox and the for attribute of the label.
<script>
  let name = "Svelte";
  let version = 5;
  let todos = [
    { id: 1, name: "Learn Deno basics", done: true },
    { id: 2, name: "Learn Hono basics", done: true },
    { id: 3, name: "Learn Svelte basics", done: false },
  ];
</script>

<h1>Hello {name}!</h1>

<ul>
  {#each todos as todo}
    <li>
      <input type="checkbox" checked={todo.done} id={todo.id} />
      <label for={todo.id}>{todo.name} (id: {todo.id})</label>
    </li>
  {/each}
</ul>
With the above component, the application would look similar to the one shown in Figure 3. As we can see, two of the checkboxes are checked, while the third is not.
