Input Bindings and Form Events
Learning Objectives
- You know how to bind input fields to variables in Svelte.
- You know how to handle form events in Svelte.
- You know how to programmatically transform form data to an object.
At the end of the last chapter, we looked into handling events. We used input events as one of the examples, where we had a component with a reactive variable, a text input field, and a function that was called whenever an input event occurred. The component was as follows.
<script>
  let text = $state("");

  const textInput = (event) => {
    text = event.target.value;
  };
</script>

<input type="text" oninput={textInput} />

<p>Text: {text}</p>
As the above — monitoring for changes in input fields — is common functionality in client-side applications, Svelte provides syntactic sugar for binding input fields to variables.
Input bindings
Binding the value of an input field to a variable is done using the bind directive, which is used jointly with the name of an attribute that should be bound. For example, bind:value binds the attribute value. The directive is given a variable that the value should be bound to, e.g. bind:value={text}.
The following shows how bind:value is used to bind the value of an input field to a variable, replicating the functionality of the example from the end of the last chapter. When the user types text to the input field, the changes are reflected to the variable text and shown to the user.
<script>
  let text = $state("");
</script>

<input type="text" bind:value={text} />

<p>Text: {text}</p>
As text is a reactive variable, we can also use it in other parts of the component. For example, below, we also show the length of the text.
<script>
  let text = $state("");
</script>

<input type="text" bind:value={text} />

<p>Text: {text}</p>
<p>Length: {text.length}</p>
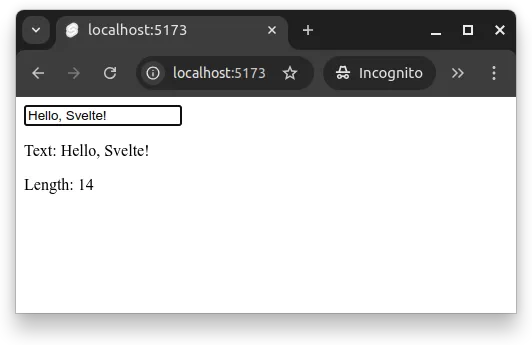
Now, whenever the user types in text to the input field, the typed text is shown to the user, and the length of the text is shown below the input field. As an example, Figure 1 below shows a screenshot of the component when the user has typed “Hello, Svelte!” to the input field.

Binding to other attributes
The type of the input field also relates to the name of the attribute that stores the value. The majority of input fields use value as the attribute name, in which case we use bind:value. However, checkboxes and radio buttons use checked as the attribute name, meaning that for them, we need to use bind:checked.
The following example shows how the checked state of a checkbox can be bound to the variable checked.
<script>
  let checked = $state(false);
</script>

<input type="checkbox" bind:checked={checked} />

<p>Checked: {checked}</p>Bindings and objects
As we learned earlier, we can make an object reactive by creating the object using the $state function. It is also possible to bind the properties of an object. The following example shows a form that could be used to add a new todo item. The form has an input field for the todo item and a checkbox to mark the todo as done.
<script>
  let todo = $state({ name: "", done: false });
</script>

<h2>Add Todo</h2>

<form>
  <label for="name">Todo</label>
  <input
    id="name"
    type="text"
    bind:value={todo.name}
    placeholder="Enter a new todo"
  />
  <div>
    <input id="done" name="done" type="checkbox" bind:checked={todo.done} />
    <label for="done">Done</label>
  </div>
</form>

<p>
  Todo: {todo.name}
</p>
<p>
  Done: {todo.done ? "Yes" : "No"}
</p>
Now, when the user types text to the input field, the changes are reflected to the variable todo.name. Similarly, when the user checks the checkbox, the changes are reflected to the variable todo.done.
Form events
Like events in general, form events can also be handled in Svelte. The following outlines a form with a text field and a submit button. To react for submit events, i.e. the user pressing the submit button, we use the onsubmit event attribute. The event attribute is given the name of the function that handles the event.
<script>
  let text = $state("");

  const submitForm = (e) => {
    console.log(text);
    e.preventDefault();
  };
</script>

<form onsubmit={submitForm}>
  <label for="textfield">Text field</label>
  <input
    id="textfield"
    name="textfield"
    type="text"
    bind:value={text}
    placeholder="Enter text"
  />
  <input type="submit" value="Submit form" />
</form>
In the above example, the submitForm function logs the value of the text field to the console and prevents the default form submission behavior. Preventing the default behavior is important, as otherwise the form would be submitted to the server, causing a page reload.
Form data from event
It is also possible to retrieve the form data from the event instead of binding the form fields to variables. The form is in the property target of the event object, and the form can be used to create an instance of FormData. An instance of FormData can then, for example, be turned into an object using the Object.fromEntries method.
The following outlines how to create an object that contains the form data when the form is submitted.
<script>
  const submitForm = (e) => {
    const formData = new FormData(e.target);
    const data = Object.fromEntries(formData);
    console.log(data);
    e.preventDefault();
  };
</script>

<form onsubmit={submitForm}>
  <label for="textfield">Text field</label>
  <input id="textfield" name="textfield" type="text" placeholder="Enter text" />
  <input type="submit" value="Submit form" />
</form>
Now, when we submit the form, we see the form data logged as a JavaScript object in the console. The object contains the form field names as keys and the field values as values.
If we do not provide the
nameattribute to the input field, the field is not included in the form data. Thenameattribute is used to identify the form field in the form data.
To reset the form once it has been submitted, we would call the reset method of the form element. The method resets the form fields to their initial values.
// ...
  const submitForm = (e) => {
    const formData = new FormData(e.target);
    const data = Object.fromEntries(formData);
    console.log(data);

    e.target.reset(); // resets the form

    e.preventDefault();
  };
// ...
Unique identifiers to created objects
When creating objects from form data, it is often useful to add a unique identifier to each object. This allows, for example, keeping track of the objects in a list, updating or deleting objects, and tracking objects even if their name would be the same.
In JavaScript, we can create unique identifiers using the UUID standard, which is available in browsers through the crypto API. For the above form data, we could add a unique identifier to each object after they have been created using the crypto.randomUUID method.
// ...
  const submitForm = (e) => {
    const formData = new FormData(e.target);
    const data = Object.fromEntries(formData);

    // assigns a unique identifier to the object
    data.id = crypto.randomUUID();
    console.log(data);

    e.target.reset();
    e.preventDefault();
  };
// ...
Form event and objects in a list
By handling form events, we can also create a form that adds objects to a list. As an example, the following component has a form that adds todo items to a list. The form has an input field for the todo item and a checkbox to mark the todo as done. The form is submitted when the user presses the submit button.
When the form is submitted, the form data is retrieved from the event, and an object is created from the form data. In addition to extracting the todo from the form, the component also assigns a unique identifier to the todo object.
The todo object is then added to the list of todos, which are shown in the application.
<script>
  let todos = $state([]);

  const addTodo = (e) => {
    const todo = Object.fromEntries(new FormData(e.target));
    todo.id = crypto.randomUUID();
    todos.push(todo);
    e.target.reset();
    e.preventDefault();
  };
</script>

<h1>Todos</h1>

<h2>Add Todo</h2>

<form onsubmit={addTodo}>
  <label for="name">Todo</label>
  <input id="name" name="name" type="text" placeholder="Enter a new todo" />
  <div>
    <input id="done" name="done" type="checkbox" />
    <label for="done">Done</label>
  </div>
  <input type="submit" value="Add Todo" />
</form>

<h2>Existing todos</h2>

<ul>
  {#each todos as todo}
    <li>
      {todo.name} ({todo.done ? "done" : "not done"})
    </li>
  {/each}
</ul>
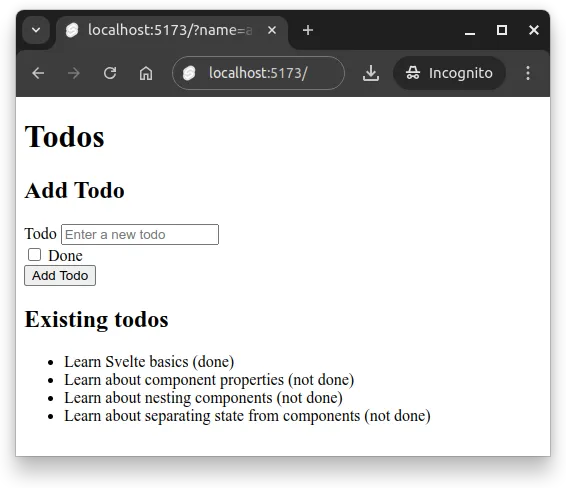
Now, whenever a user submits a todo using the form, the todo is added to the list of todos, which is shown in the application. Figure 2 shows a screenshot of the component with four todos on the list.

Objects and reactivity
When we previously mentioned that we can make an object reactive by creating the object using the $state function, we did not go in more depth into what that means in terms of what will be reactive. In Svelte 5, objects are deeply reactive, which means that they are reactive to changes in their properties.
This allows, for example, expanding the previous example so that a checkbox is added to the list of todos, and the checkbox binds to the done property of each todo. This way, the user can mark todos as done by binding each todo in the #each block.
<script>
  let todos = $state([]);

  const addTodo = (e) => {
    const todo = Object.fromEntries(new FormData(e.target));
    todo.id = crypto.randomUUID();
    todos.push(todo);
    e.target.reset();
    e.preventDefault();
  };
</script>

<h1>Todos</h1>

<h2>Add Todo</h2>

<form onsubmit={addTodo}>
  <label for="name">Todo</label>
  <input id="name" name="name" type="text" placeholder="Enter a new todo" />
  <div>
    <input id="done" name="done" type="checkbox" />
    <label for="done">Done</label>
  </div>
  <input type="submit" value="Add Todo" />
</form>

<h2>Existing todos</h2>

<ul>
  {#each todos as todo}
    <li>
      <input type="checkbox" bind:checked={todo.done} id={todo.id} />
      <label for={todo.id}>
        {todo.name} ({todo.done ? "done" : "not done"})
      </label>
    </li>
  {/each}
</ul>
The above example also uses the identifier of the todo to add a label for the checkbox. This way, the user can click the label, and the checkbox will be checked. Trying the above application out, you will notice that the user can add todos and mark todos as done by checking the checkboxes. The changes are reflected in the application.
We could further expand the example by adding a button to remove todos from the list. The button would call a function that removes the todo from the list when clicked. The function would be given the todo object as a parameter, and the function would filter the todos list to remove the todo with the given identifier.
<script>
  let todos = $state([]);

  const addTodo = (e) => {
    const todo = Object.fromEntries(new FormData(e.target));
    todo.id = crypto.randomUUID();
    todos.push(todo);
    e.target.reset();
    e.preventDefault();
  };

  const removeTodo = (todo) => {
    todos = todos.filter((t) => t.id !== todo.id);
  };
</script>

<h1>Todos</h1>

<h2>Add Todo</h2>

<form onsubmit={addTodo}>
  <label for="name">Todo</label>
  <input id="name" name="name" type="text" placeholder="Enter a new todo" />
  <div>
    <input id="done" name="done" type="checkbox" />
    <label for="done">Done</label>
  </div>
  <input type="submit" value="Add Todo" />
</form>

<h2>Existing todos</h2>

<ul>
  {#each todos as todo}
    <li>
      <input type="checkbox" bind:checked={todo.done} id={todo.id} />
      <label for={todo.id}>
        {todo.name} ({todo.done ? "done" : "not done"})
      </label>
      <button onclick={() => removeTodo(todo)}>Remove</button>
    </li>
  {/each}
</ul>
Now, the user can mark todos as done by checking the checkboxes, and remove todos from the list by clicking the remove button. The changes to the todos variable are reflected in the application.