Passwords and Users
Learning Objectives
- You know of hashing and verifying passwords, and you know how to store passwords on the server.
- You can create an API for registering and authenticating users.
- You can create a login and registration form.
Hashing and verifying passwords
Passwords are stored as one-way hashes. This means that during storing of the password, the password is transformed to a hash (a string) using a cryptographic hash function (which should be non-trivial to invert). To avoid a scenario where the same passwords have the same hashes, a random value called salt is typically added to the password before hashing it.
Passwords should never be stored in plaintext format.
When checking whether a password from a user matches the password stored on the server, the password from the user is hashed and compared against the previously stored hash of the password.
Here, we will use a library called scrypt for hashing and verifying the passwords. The scrypt library is an implementation of the scrypt algorithm. To add the scrypt library to your server-side application, modify the deno.json file to include the library. After the modification, the file should be as follows.
{
  "imports": {
    "@hono/hono": "jsr:@hono/hono@4.6.5",
    "postgres": "https://deno.land/x/postgresjs@v3.4.4/mod.js",
    "scrypt": "jsr:@denorg/scrypt@4.4.4",
    "zod": "https://deno.land/x/zod@v3.23.8/mod.ts",
    "zValidator": "npm:@hono/zod-validator"
  }
}
The scrypt library has two functions, hash and verify. The hash function takes a password as a parameter and returns a hash of the password. The verify function takes a password and a hash as parameters, and returns a boolean indicating whether the password matches the hash. The hash function also automatically generates a random salt and adds it to the password, so the hash is different each time the function is called.
import { hash, verify } from "jsr:@denorg/scrypt@4.4.4";

const hashedPassword = hash("asparagus");
console.log(hashedPassword);
When running the above program, we see different outputs each time.
deno run app.js
c2NyeXB0ABEAAAAIAAAAAYF6ZbnPaea+wSlyjzks81oRqRdiPVyHm+2y/h7Hk4SYYaJUdrVYrFbelklXoNOER0NDPd7CFkXZVSBNnNfWXOM1ec5WVPToWnx9jF4uTMNq
deno run app.js
c2NyeXB0AA4AAAAIAAAAAX82yopYMZJyHkmR2qRYO/F/ykE6BwHrsfBxsleEQ37pqe3BjozKwB5vy/bDHjOSMTFWWZSTuAi1m2tQq22PFrjG9UWLXfmTcp8fkuSKA7WS
In the following example, we hash the password ‘asparagus’, and then compare the hash with the strings “asparagus” and “password”.
import { hash, verify } from "jsr:@denorg/scrypt@4.4.4";

const hashedPassword = hash("asparagus");
console.log(hashedPassword);

const passwordsMatch = verify("asparagus", hashedPassword);
console.log(passwordsMatch);

const passwordsDoNotMatch = verify("password", hashedPassword);
console.log(passwordsDoNotMatch);
The output of the above program is as follows, with the exception that the hash is different each time the program is run.
deno run app.js
c2NyeXB0ABEAAAAIAAAAAS2gleJXQhfvqC/1EKW2X7BHW82R1BB/+ppmiuMFEJcEnDAHwQbm4itDyA0pjvhaL80El8m3FUJR7wxVNAAyNrejHUcDeJkKg23N9x3bpzj9
true
falseAuthentication API
Next, let’s use hashing and verifying of passwords to create an API for registering and authenticating users. We use the database table for users from the chapter on database migrations as the schema when storing user information. The create table command was as follows.
CREATE TABLE users (
  id SERIAL PRIMARY KEY,
  email TEXT NOT NULL,
  password_hash TEXT NOT NULL
);

CREATE UNIQUE INDEX ON users(lower(email));
Using the above database table and the scrypt algorithm, we can create API endpoints for registering and logging in.
The example that starts from here builds until the end of the chapter “Protecting Routes and Data”. Follow along the example, working on it on your local walking skeleton. At the end of the example, you will have an application that allows registering and logging in users, where the users can have personal notes.
At the end of the chapter “Protecting Routes and Data”, you will be asked to submit the client-side functionality of the application that you work through the materials as an exercise.
Registering a user
The endpoint for registering a user would involve reading the email and password from the request, hashing the password, and then storing the email and the hashed password to the database.
app.post("/api/auth/register", async (c) => {
  const data = await c.req.json();

  const result = await sql`INSERT INTO users (email, password_hash)
    VALUES (${data.email.trim().toLowerCase()},
    ${hash(data.password.trim())}) RETURNING *`;
  return c.json({ "message": `Registered as user ${result[0].id}.` });
});
With the above, we can try adding a user.
curl -X POST -d '{"email": "test@test.com", "password": "secret"}' localhost:8000/api/auth/register
{"message":"Registered as user 1."}%
If you try adding the same user twice, you will get an error, as the email must be unique.
In the above examples, we do some cleanup, which includes trimming the password and the email, and setting the email to lowercase. If you are wondering why we trim the email, the book Ender’s game might be an interesting read (the book doesn’t have anything to do with usernames though).
Spoiler: If the email or username is not trimmed, a trailing space could allow impersonating someone else.
Authenticating user
Similarly, logging in requires reading the email and password from the request, retrieving the user from the database based on the email, and then verifying the password.
app.post("/api/auth/login", async (c) => {
  const data = await c.req.json();

  const result = await sql`SELECT * FROM users
    WHERE email = ${data.email.trim().toLowerCase()}`;

  if (result.length === 0) {
    return c.json({
      "message": "User not found!",
    });
  }

  const user = result[0];

  const passwordValid = verify(data.password.trim(), user.password_hash);
  if (passwordValid) {
    return c.json({
      "message": `Logged in as user with id ${user.id}`,
    });
  } else {
    return c.json({
      "message": "Invalid password!",
    });
  }
});
With the above in place, we can try to log in as a user. If the user exists, a message confirming the login is shown.
curl -X POST -d '{"email": "test@test.com", "password": "secret"}' localhost:8000/api/auth/login
{"message":"Logged in as user with id 1"}%
On the other hand, if the user does not exist, we see a message indicating that the user was not found.
curl -X POST -d '{"email": "another@test.com", "password": "secret"}' localhost:8000/api/auth/login
{"message":"User not found!"}%
Similarly, if the password is incorrect, we see a message indicating that the password was invalid.
curl -X POST -d '{"email": "test@test.com", "password": "test"}' localhost:8000/api/auth/login
{"message":"Invalid password!"}%The last example shows a flaw in the system. If a user does not exist, the system should only tell that the email or password was incorrect. Otherwise, malicious users could exploit this information to identify system users by cross-referencing a list of known emails.
In a complete application, we would also have validation, logout, and password change functionalities, and such a system could also include functionality for verifying the user by sending an email.
Sending emails is a common part of web applications. To send emails, you would need to have an email server that allows sending emails. Often, third party APIs such as Postmark, Mailgun, SendGrid, or Amazon SES are used. Other possibilities also exist.
Login and registration form
Let’s next create the login and registration forms. To keep them simple, we only ask for the email and password in both of them, so content-wise they are very similar.
As the forms are very similar, we can use the same form for both login and registration.
Create a folder auth in the src/routes folder, and then another folder called [action] in the auth folder. Now, all requests to the path /auth/[action] will be routed to the [action] folder, where [action] can be any value.
Create the file +page.js to the [action] folder, and add the following code to it. The following code uses an error function from SvelteKit to throw a 404 error if the action is neither login or register. Otherwise, the function looks similar to what we have used previously — it exposes the parameters to the page, which we can then use from the data property.
import { error } from "@sveltejs/kit";

export const load = ({ params }) => {
  if (params.action !== "login" && params.action !== "register") {
    throw error(404, "Page not found.");
  }

  return params;
};
Next, create the file +page.svelte in the [action] folder, and add the following code to it.
<script>
import { PUBLIC_API_URL } from "$env/static/public";
let { data } = $props();
let message = $state("");
const handleForm = async (e) => {
const user = Object.fromEntries(new FormData(e.target));
const response = await fetch(`${PUBLIC_API_URL}/api/auth/${data.action}`, {
method: "POST",
headers: {
"Content-Type": "application/json",
},
body: JSON.stringify(user),
});
const jsonData = await response.json();
message = jsonData.message;
e.preventDefault();
};
</script>
<h2 class="text-xl pb-4">
{data.action === "login" ? "Login" : "Register"} form
</h2>
{#if message}
<p class="text-xl">Message from server: {message}</p>
{/if}
<form class="space-y-4" onsubmit={handleForm}>
<label class="label" for="email">
<span class="label-text">Email</span>
<input
class="input"
id="email"
name="email"
type="email"
placeholder="Email"
/>
</label>
<label class="label" for="password">
<span class="label-text">Password</span>
<input class="input" id="password" name="password" type="password" />
</label>
<button class="w-full btn preset-filled-primary-500" type="submit">
{data.action === "login" ? "Login" : "Register"}
</button>
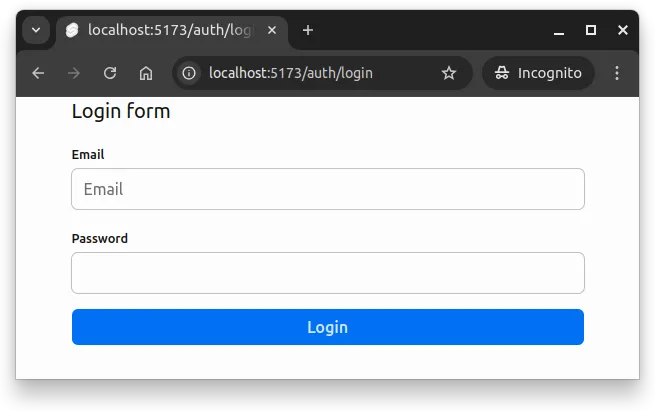
</form>The form looks similar to the one in Figure 1.
The form has two fields, email and password, and a submit button. The form is submitted using the handleForm function, which reads the data, sends it to the server, and then assigns the message from the server to the message variable. The message is then shown to the user.
Our solution is quite nice, but it has a problem. When we send the data, the data is sent using the GET method, which is the default method for forms. This means that the sent data will be visible in the address bar. This is not a good practice, as the data could be sensitive.
Let’s fix this next.