Running the Walking Skeleton
Learning Objectives
- You can obtain the walking skeleton and start the extracted practice application.
- You can verify its browser, API, and database connection separately.
- You can stop and restart the local environment without using a database reset as a routine troubleshooting step.
A walking skeleton connects the main pieces of an application with a small amount of working functionality. It is more than a picture of an interface, but much less than a finished product. Let’s start one and see what happens when we use it. We will look inside its files in the following chapters, so you don’t need to understand every piece yet.
A full-stack application includes both client-side and server-side functionality. The walking skeleton connects the browser interface to an API that also reads stored data from PostgreSQL.
The supplied walking skeleton contains a counter, an API health endpoint, a database-backed /api/todos endpoint, and a small todos table.
Obtain the walking skeleton
Download the Part 1 walking skeleton and extract it. Rename the extracted walking-skeleton directory to practice, then open it in your editor. This extracted copy is the practice application. Use it for chapter examples and local observations throughout the course. Commands below run from the root of the practice application (practice/), where compose.yaml is located.
practice/├── api/│ ├── src/│ └── tests/├── client/├── database-migrations/│ └── 001_create_todos.sql├── e2e-tests/├── scripts/├── compose.yaml├── compose.test.yaml├── project.env└── deno.jsonUse the practice application as supplied, including its framework configuration. This keeps your files aligned with the examples as we explore them; there is no need to create another SvelteKit application for the chapter examples. The course version table identifies the intended toolchain, and the walking skeleton archive contains its exact direct dependency declarations.
Later in Part 1, the first marketplace milestone provides a separate course-managed Git repository. Clone it into a directory named marketplace; the resulting local working copy is the marketplace repository, and the cumulative application you build in it is the marketplace project. The practice application and marketplace repository begin from the same walking skeleton, but they are separate working copies. Do not copy chapter experiments into the marketplace repository unless a marketplace milestone explicitly asks you to apply the same idea there. Exercise cards can also provide an exercise starter; complete such work in the exercise environment named by its handout.
Compose derives the development Compose project name from the directory name unless you set COMPOSE_PROJECT_NAME. Give different copies distinct directory names or explicit Compose project names so their containers, networks, and volumes remain separate. They still publish the same host ports: stop one development application before starting another on ports 5173 and 8000.
If you already have an older download, preserve its directory and database volume and extract this revision under a new name. The new neutral database configuration does not rename an existing database.
Check the host tools
You need Docker with Compose 2.24.4 or newer, a browser, and a code editor to run and explore the practice application. The Docker installation documentation gives platform-specific installation instructions. The Docker engine must be running, not just its command-line executable installed. The minimum Compose version supports the !override tag used by compose.test.yaml.
docker --versiondocker compose versionCompose lets us run the application without installing Node.js, npm, PostgreSQL, Deno, or dbmate on the host. The API and client tooling use Deno inside their containers. The migration service supplies dbmate, and the end-to-end runner uses the supplied Playwright image and npm inside its container. You will meet these tools as we use them; for now, their containers provide what they need.
Keep the original ZIP and save a copy of any experiments you want to retain. You can extract the ZIP into a new directory whenever you want a fresh starting point, without replacing your existing work.
Start the application
Now, in the directory containing compose.yaml, run:
docker compose up --buildThe first build obtains base images and application dependencies, so network access is needed and startup may take a little while. Leave this terminal open to see service output. If a build or service exits with an error, pause here and check its output before moving on. The log commands below will help you find which service needs attention.
Figure 1 shows the order in which Compose waits for the services to become ready.

You may notice that database-migrations exits while the other services keep running. That is expected: it runs dbmate as a one-shot job, and an exit code of zero means the job completed successfully.
Check each boundary
Let’s check the running application from a few angles. First, open the address http://localhost:5173 in a browser. The page should look similar to the one shown in Figure 2.
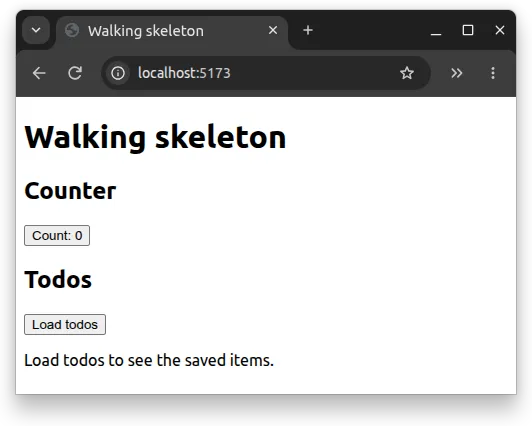
Then, in a second browser tab, open the following addresses:
http://localhost:8000/healthhttp://localhost:8000/api/todosThe first address responds with a simple JSON object indicating the API is running.
{ "status": "ok" }The second address returns the current todo rows in JSON format. On a fresh database, it contains the seeded record.
[{ "id": 1, "name": "Finish walking skeleton" }]Your record’s ID may differ if the database has been used before. Use the ID in your actual response when following the examples; the value 1 above illustrates a fresh database.
If you click the buttons in the browser tab that has the practice application, you can see the counter increase and the todo list load. The counter changes local browser state, while Load todos requests stored rows through /api/todos.
Observe service status and logs
In a second terminal at the root of the practice application (practice/):
docker compose ps --alldocker compose logs apidocker compose logs database-migrationsLook for a successful migration and healthy API/client services. If something fails, start with the service reporting the problem and its first relevant error. This gives you a place to investigate before changing files. You don’t have to diagnose every startup problem on your own: include that output when asking for help.
Room-booking startup observations
0 / 5 points
A room-booking exercise starter produces these observations:
- its page loads and its local expand button changes the page;
GET /healthreturns a successful JSON response from the API;GET /storage-healthsucceeds after the API runsSELECT 1; and- the one-shot schema service has exited with code 0.
Select every claim directly supported by these observations.
Stop and restart
Press Ctrl+C in the foreground terminal to stop the attached services. To stop and remove the application’s containers and network, use:
docker compose downThen restart:
docker compose upDo not add -v to routine shutdown: it removes the volumes that hold the database’s saved data. Chapter 1.6 explains persistent data and deliberate resets. Docker documents the difference between ordinary shutdown and volume removal.
A planned recipe-app restart
0 / 5 points
A local recipe application stores saved recipes in a named database volume declared by its Compose project. You need to stop and remove its containers and network, then recreate the application later without intentionally resetting its data. No dependency or image input has changed.
Select every accurate statement about this procedure.
The configuration files you will meet
The practice application’s project.env provides disposable local database configuration to PostgreSQL, dbmate, and the API. It already contains the coursework credentials, so there is no secret file to create. Keep it unchanged while following the examples. These values are deliberately not production secrets. The development services publish ports on your host. Do not expose this unfinished setup on the public Internet or store real personal data in it.
There are several unfamiliar files here, and it is fine to have questions about them. For now, you have a starting point for running the application and checking its output. Next, we’ll look at the containers we just started. We will return to database state in Chapter 1.6 and tests in Chapter 1.8.
Check Your Understanding
- What does the walking skeleton let you try before you understand all its source files?
- Why is it normal for the migration service to exit successfully while the API keeps running?
- What can you learn from
/health, and what additional behavior does/api/todoscheck? - Where would you look first if a service fails to start?
- How does ordinary
docker compose downdiffer from adding-v, and why does that matter for your data?